Intro
I am myself still struggling with the sheer number of parameters that can and have to be tuned for a VESC based boardwheel (I’ll use that as a generic term for all Onewheel-like boards). There are many articles, forum posts and videos available, but when I have to set-up a board from scratch, it takes me ages to find all the information I need at that moment, and those documents often don’t exactly fit my setup, so I decided to go through the process once, and document what I did. That way I will at least make my own life easier the next time.
This document obviously has the potential to become yet another document like the ones I described above: it may not be usable for other setups, and I’m not even sure if it will be 100% accurate for myself when I will be using it for future setups. But at least this gives me a simple process that I know has worked for me once.
I am using some parameters that should make it a bit easier to use for other configurations:
- Battery pack
- S Number of battery cells in series
- P Number of battery cells in parallel
- bA Advertised discharge current of each battery
- bAh Advertised capacity of each battery
- Motor
- mA Motor maximum current
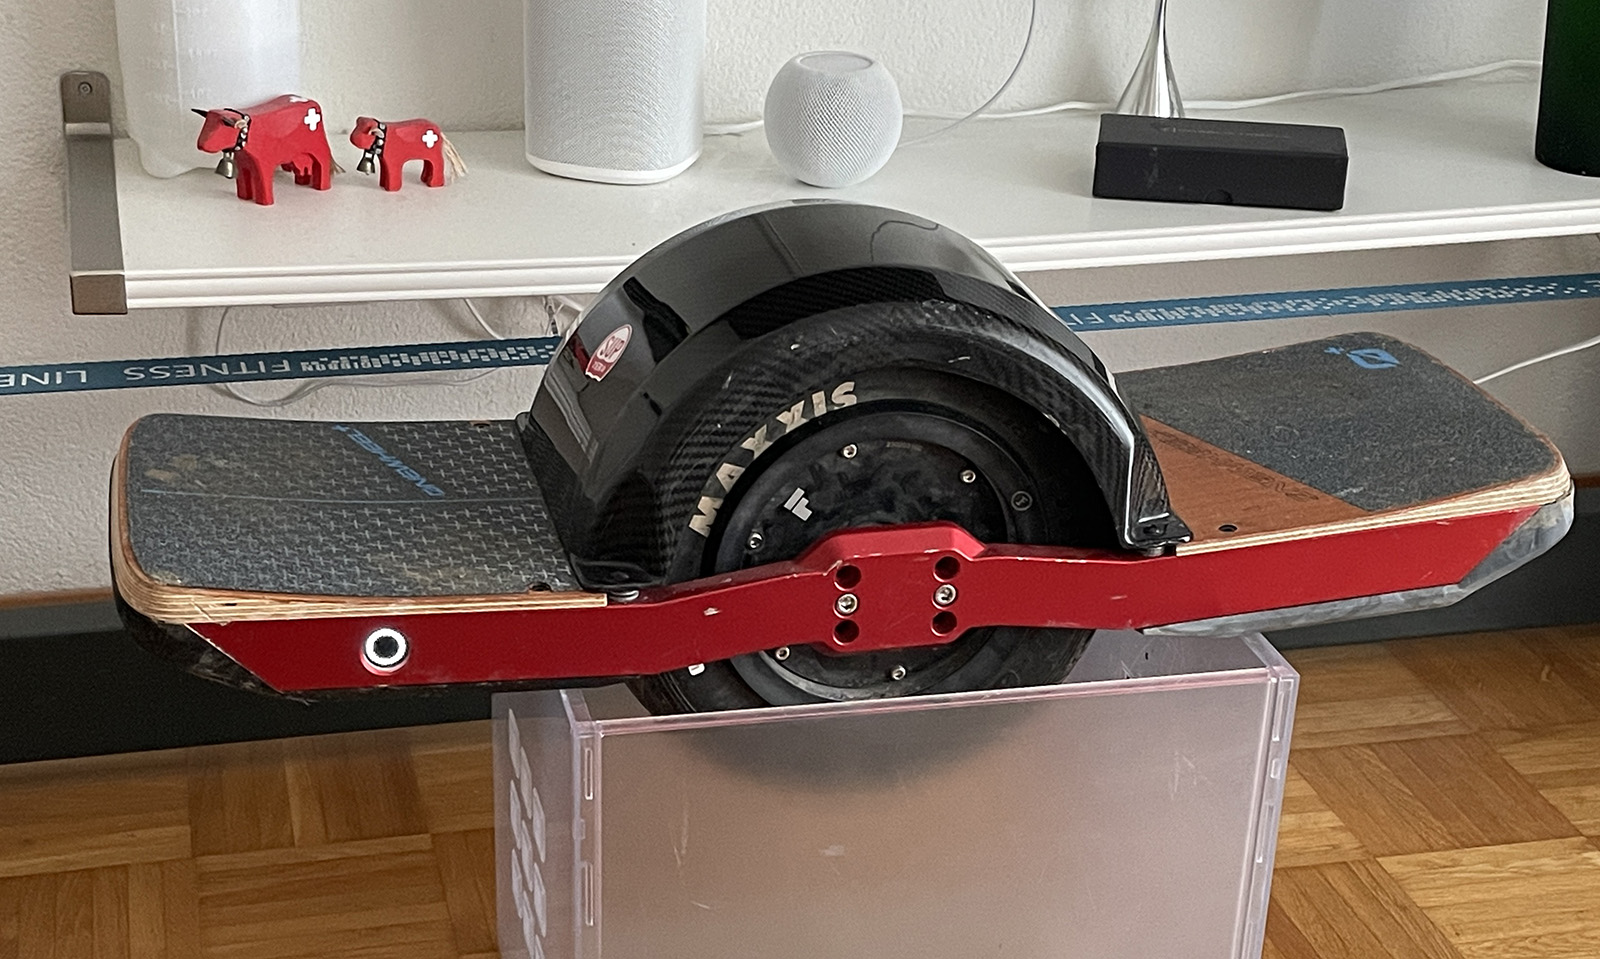
In this example I am setting up a boardwheel with a Fungineers Superflux Motor (v1) and a 16S2P Molicel P42A battery pack, so my parameters are: S=16, P=2, bA=45, bAh=4.2, and the mA for the Superflux motor should be at least 120A. I am using a charge-only zBMS by zbattery.solutions.
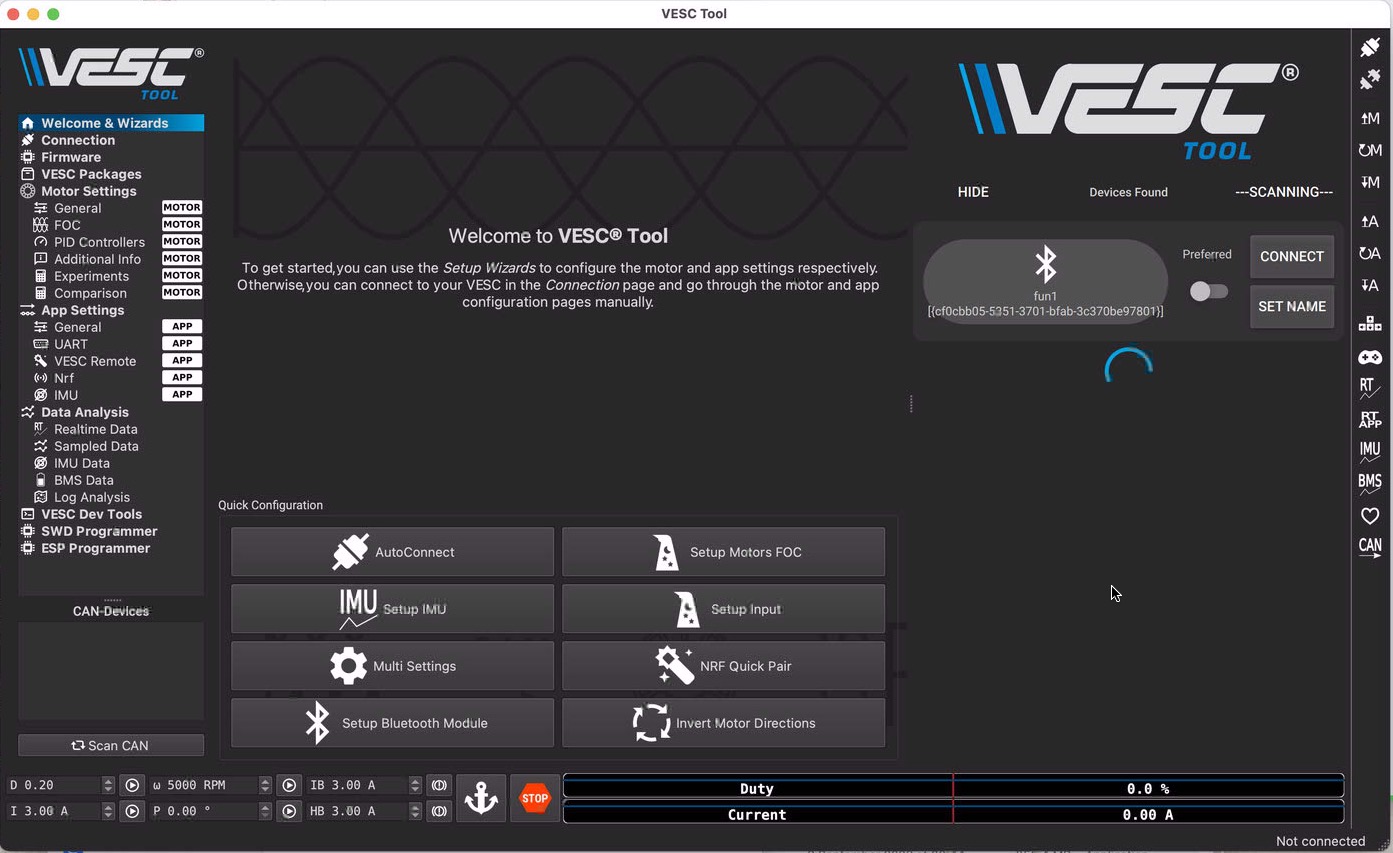
VESC Tool
I am doing this using the VESC Tool app on a Mac, which I find an easier user interface than on a phone. If you want to use a phone, I recommend using an Android phone, as the Bluetooth connection on iPhones is really flakey, and it is annoying if the connections drops every now and then before you were able to write certain settings to the VESC.
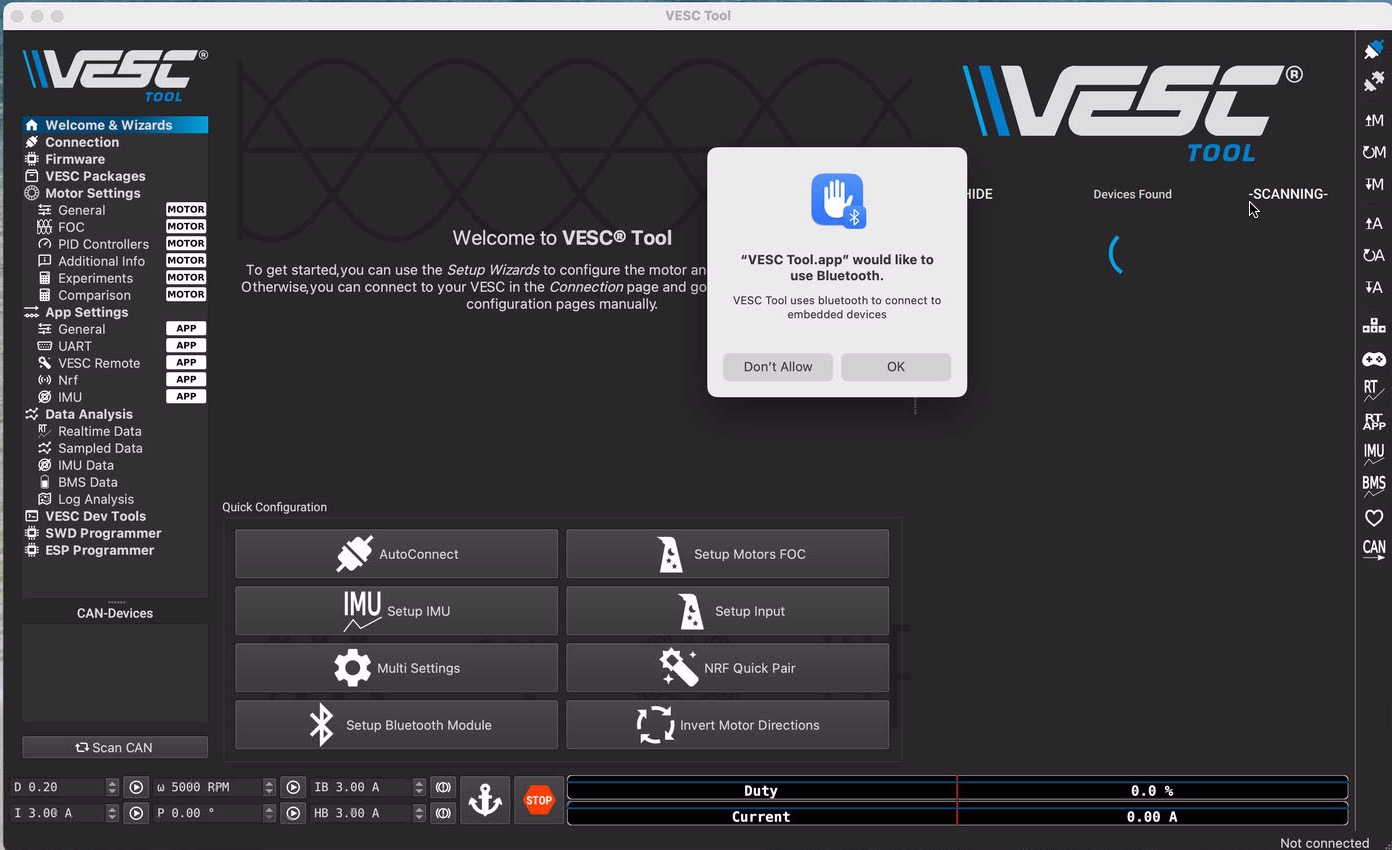
On a Mac, I have different Bluetooth problems, as the VESC Tool keeps crashing when trying to connect to the VESC:
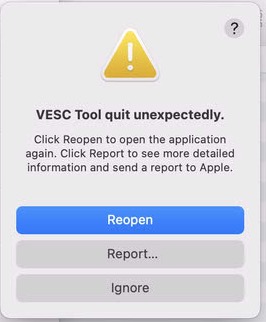
The only solution I know is to completely remove the VESC Tool from the Privacy & Security control panel, i.e. remove it with the ‘- ‘symbol, as opposed to just disabling it.
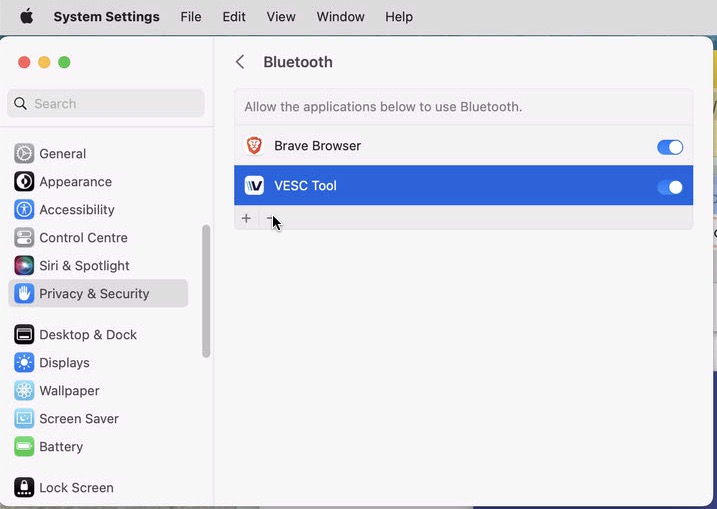
Then restart the VESC Tool, and allow it to use Bluetooth. That should make it work, but I typically have to repeat this routine the next time I start the app. I typically leave the System Settings window open, as I have to remove the VESC Tool allowance a couple of times per day – a bit of a hassle, but you’ll get used to it. I do hope it will get fixed soon though.
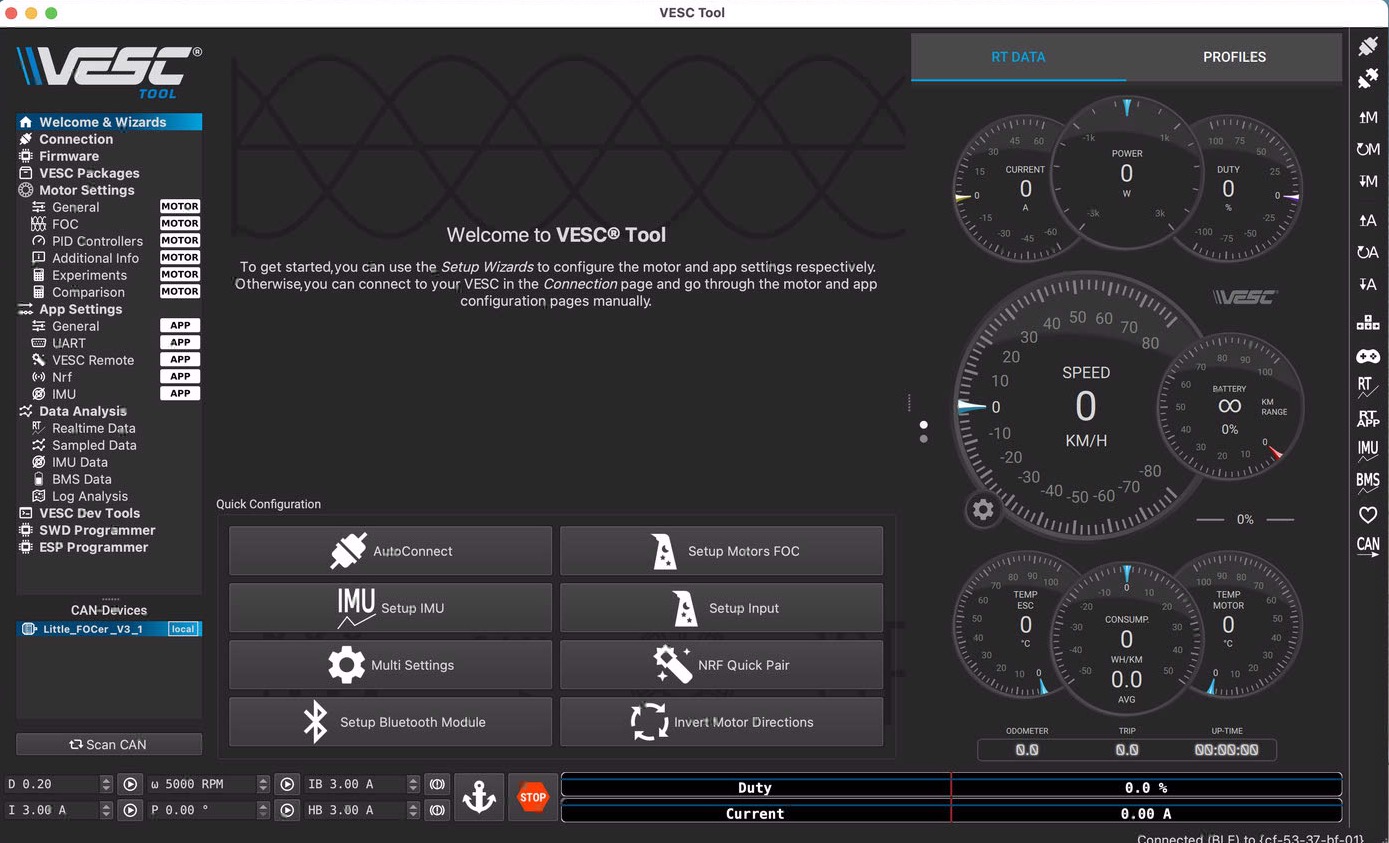
After that, the VESC Tool should let you connect to the VESC:
Motor
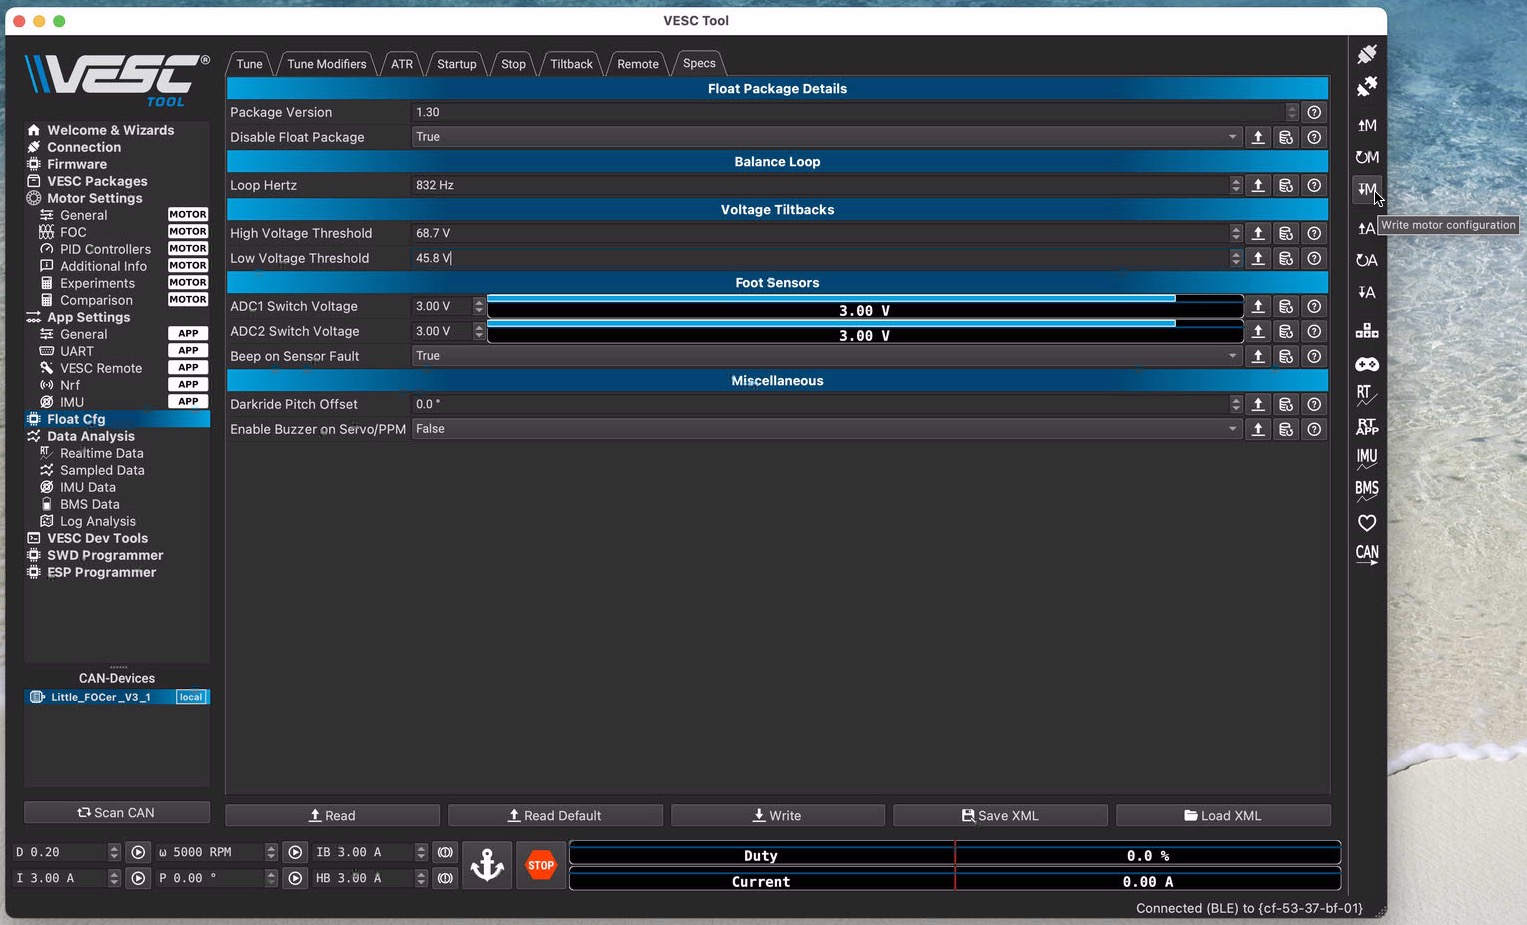
If you had already installed the Float Package, make sure to disable it while using the wizards for setting up the motor and the IMU, otherwise your motor will just make some funny noises, and the wizards won’t work correctly. To disable it, go to / Float Cfg / Specs and select True for the field ‘Disable Float Package’. Then write the motor configuration.
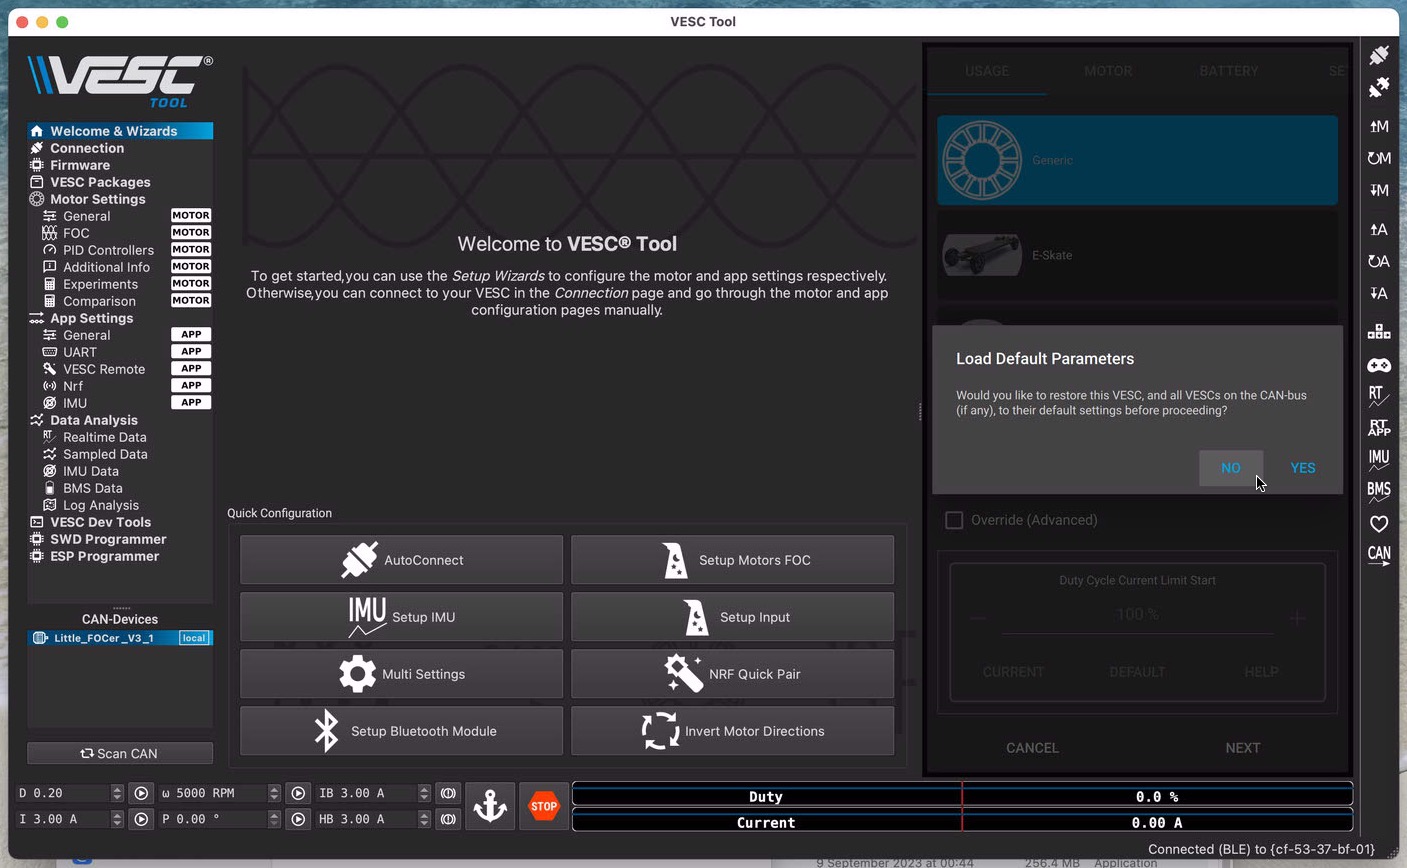
Go to / Setup Motors FOC (the motor setup wizard)
For a fresh install, choose Yes to load the default parameters. Choosing No here will keep some settings from an earlier motor setup.
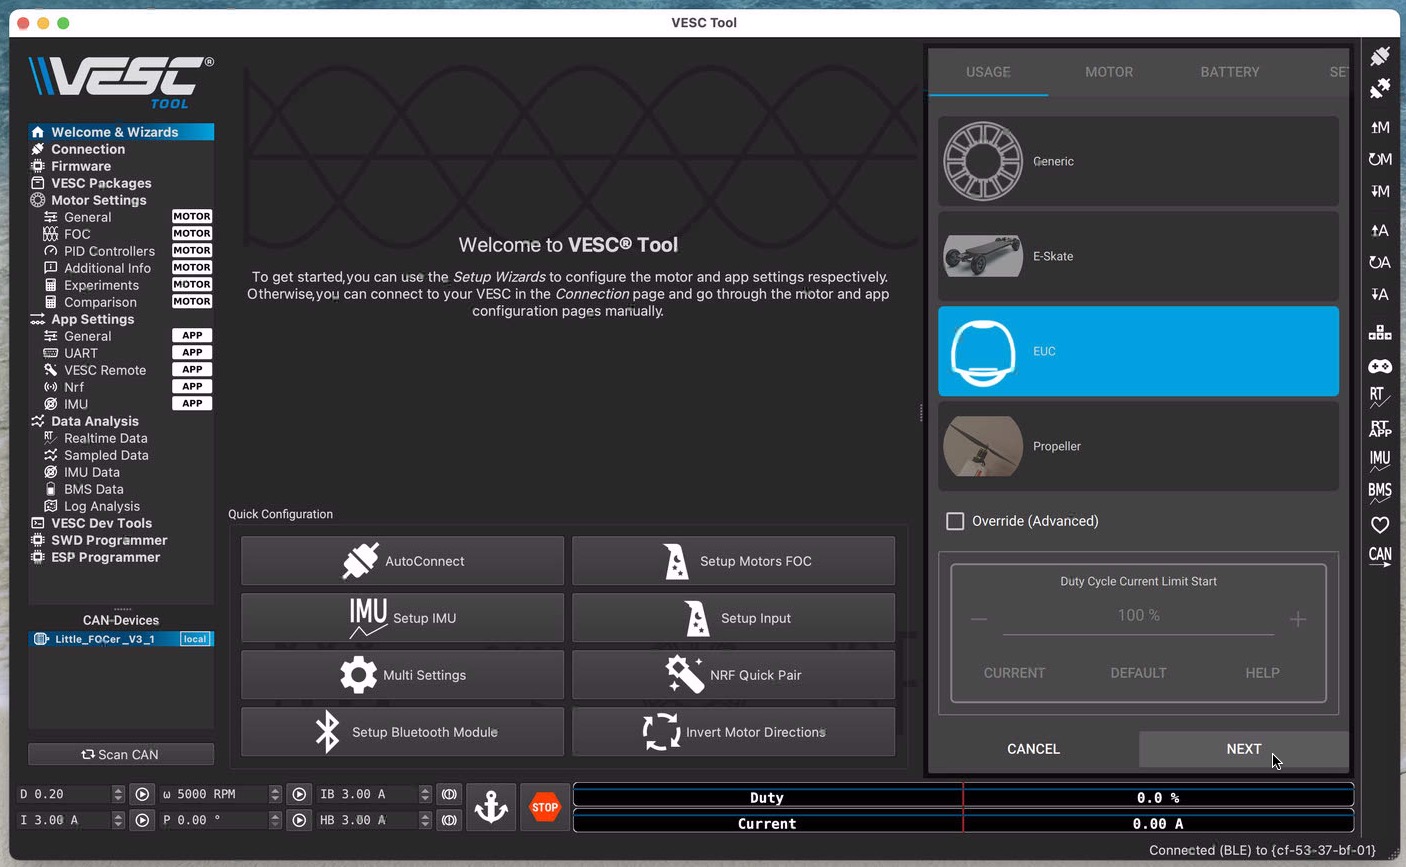
Choose EUC (Electric UniCyle). Some versions of the VESC Tool may call this ‘Balance Board’ or similar.
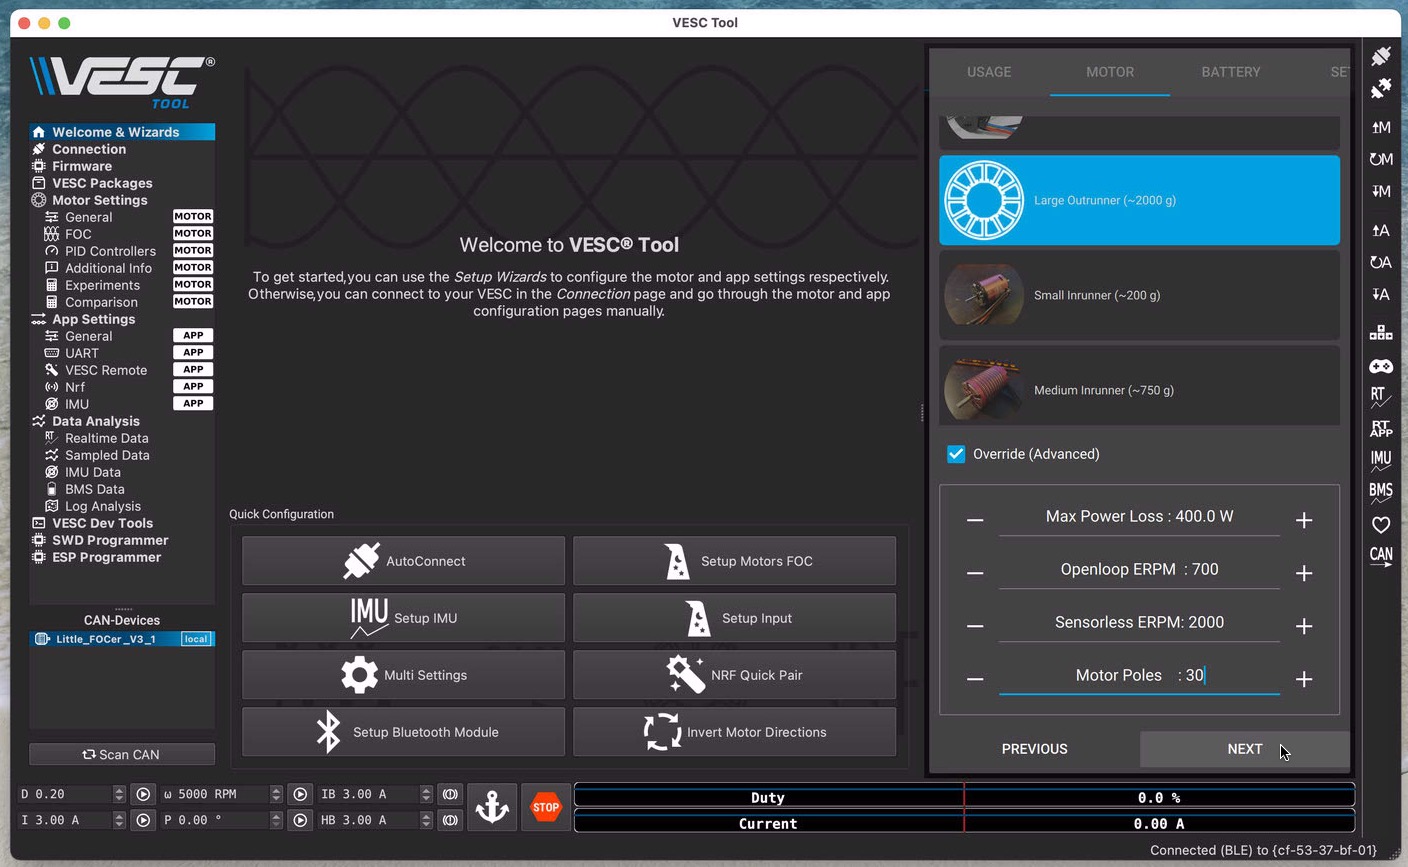
Choose Large Outrunner, select Override, and fill in the following settings:
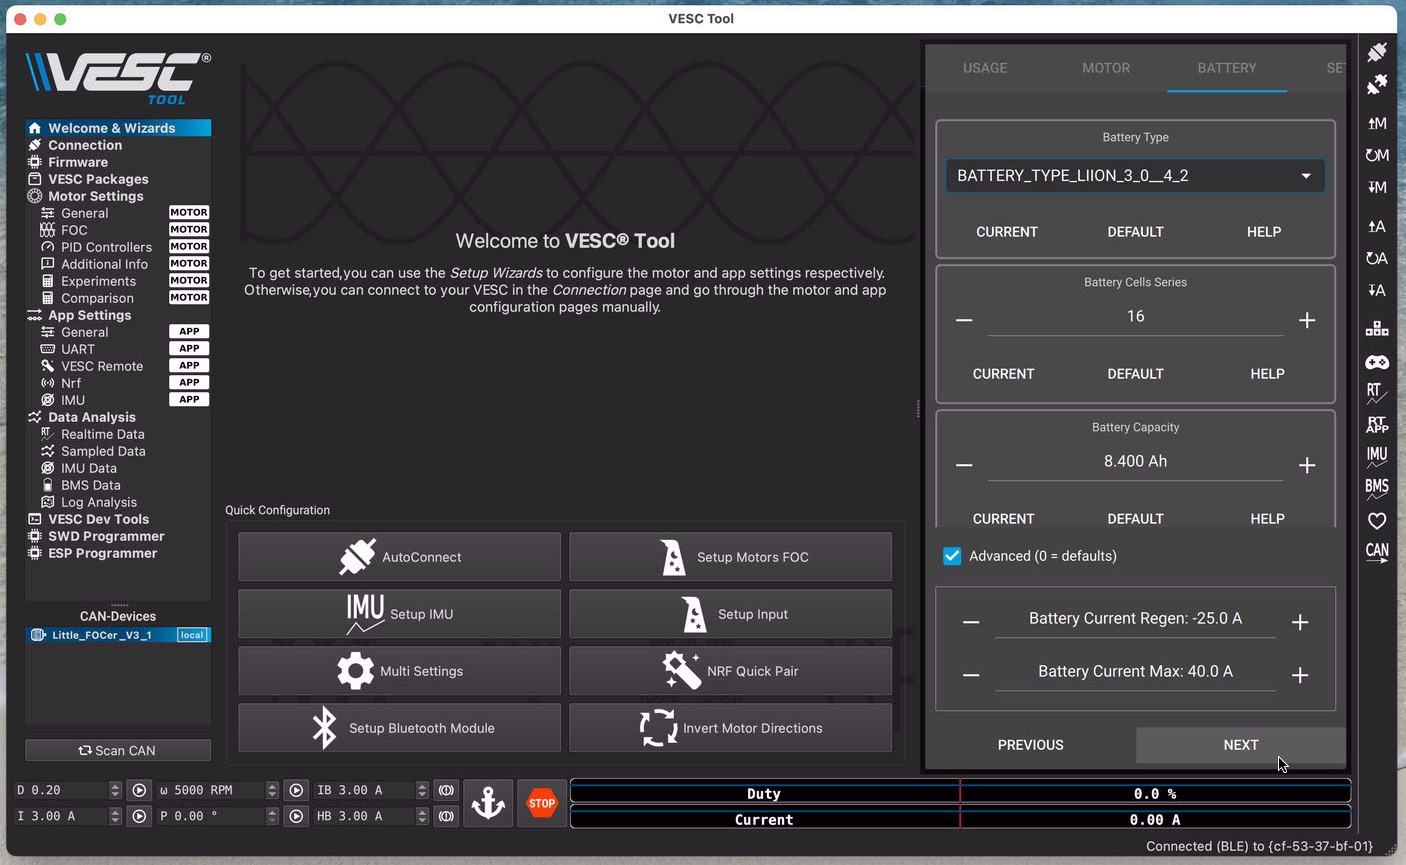
Click Next and fill in the battery settings. For Battery Capacity, use P*bAh, in our case 2*4.2=8.4Ah
Do not use the maximum discharge current P*bA. In our case, that maximum would be 2*45A = 90A. I lowered that to roughly half (40A), and for Regen even a bit lower (-25A), to keep things safe. I need some further study on this – maybe it’s safe to go a bit higher.
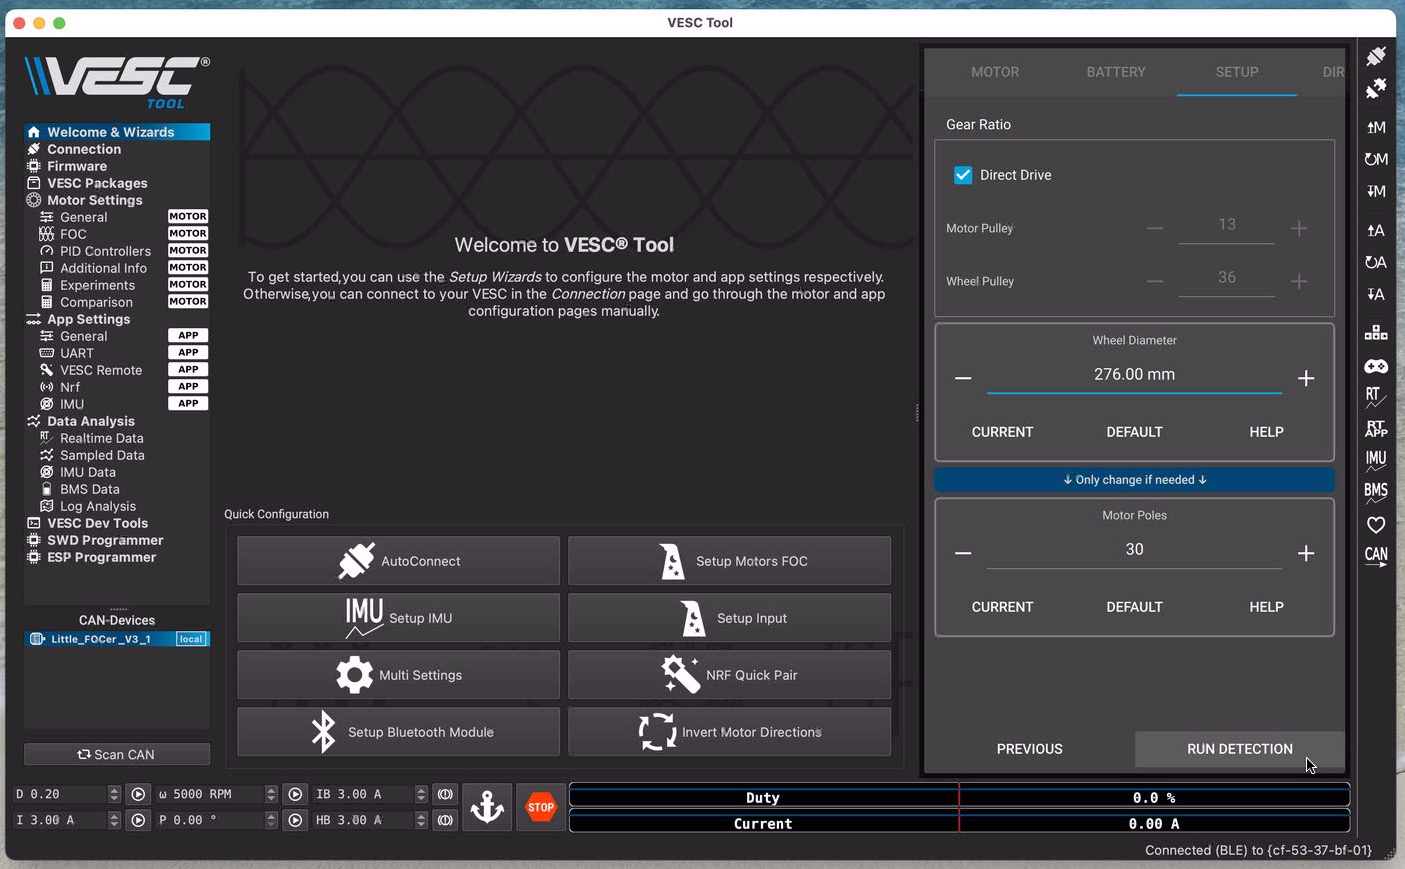
Select Direct Drive (we don’t use chains or belts). I measured my Maxxis to have a diameter of 276 mm. The precision here is not very important, but if it is way off, you will get wrong speed readings. Double check if motor poles is still set to 30.
Now make sure your board is on a crate or similar, roughly flat, so that the wheel and tire don’t touch anything and can spin freely. Then run the detection of the motor values.
Deselect ‘Detect all motors over CAN Bus’, as we only have one motor anyway.
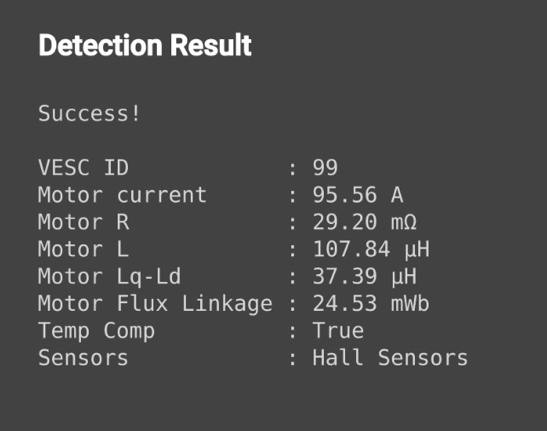
You might as well take a screenshot of the detection results, so you can still reference it later.
Next, click FWD and REV to let the motor spin, and make very sure the direction is correct. I had to invert it. This depends on how you connected the 3 motor cables to the VESC. Any cable order is OK, but as a result, you may need to switch on Invert here.

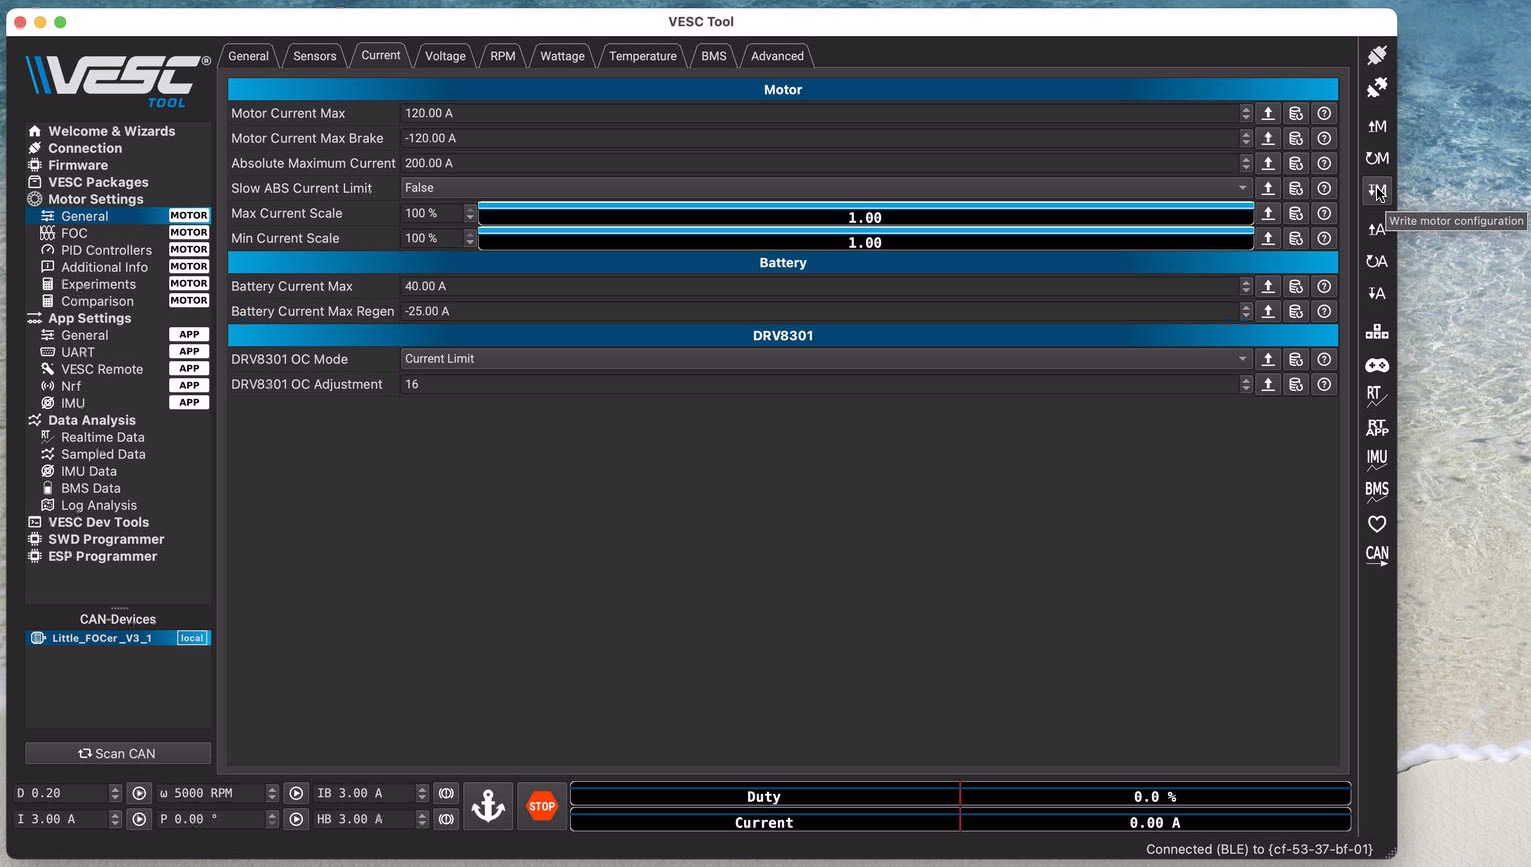
Go to / Motor Settings (or Cfg) / General / Current
For the Superflux Motor, you can use much higher currents than proposed. I use 120A and -120A. The absolute maximum current should be roughly 50% higher than this value. I used 200A. The battery current max values were already set earlier. This is a good moment to click WRITE or Write Motor Configuration, to save all values from the VESC Tool to the VESC.
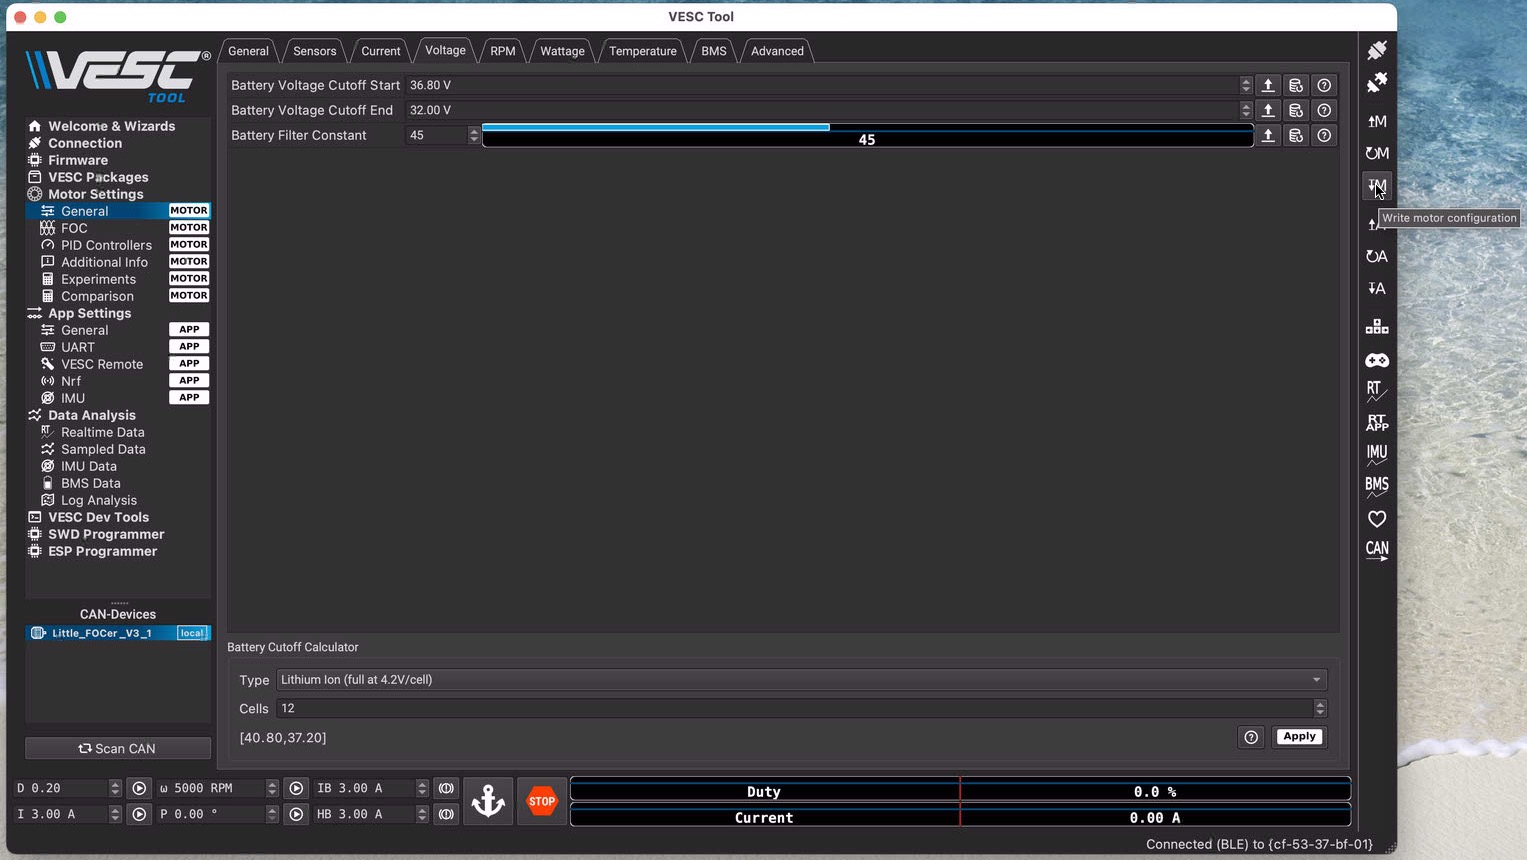
In the Voltage tab, the Battery Voltage Cutoff values should be really low, as we want to solve low battery voltages with tiltback (in the Float Package, later), and not by completely shutting off the motor. I am using 2.3V for really low voltage, and 2.0V for really really low voltage, and then multiply those by S, in my case 2.3V * 16 = 36.8V, and 2.0V * 16 = 32V
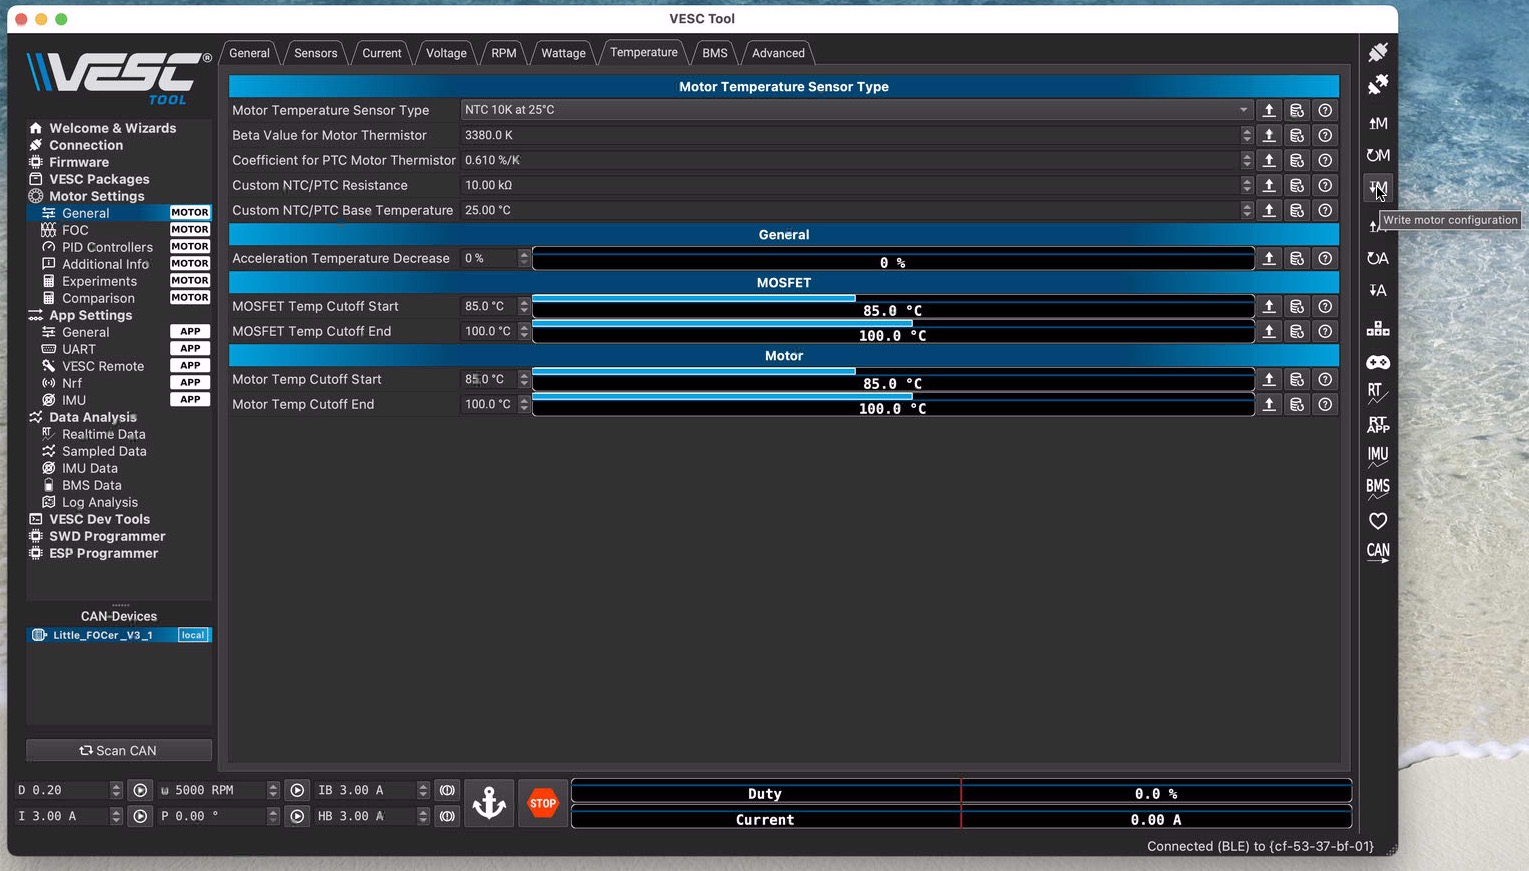
In the temperature tab, set the Temperature Cutoff values higher, as we want tiltback when things run hot instead of a complete power cutoff to the motor.
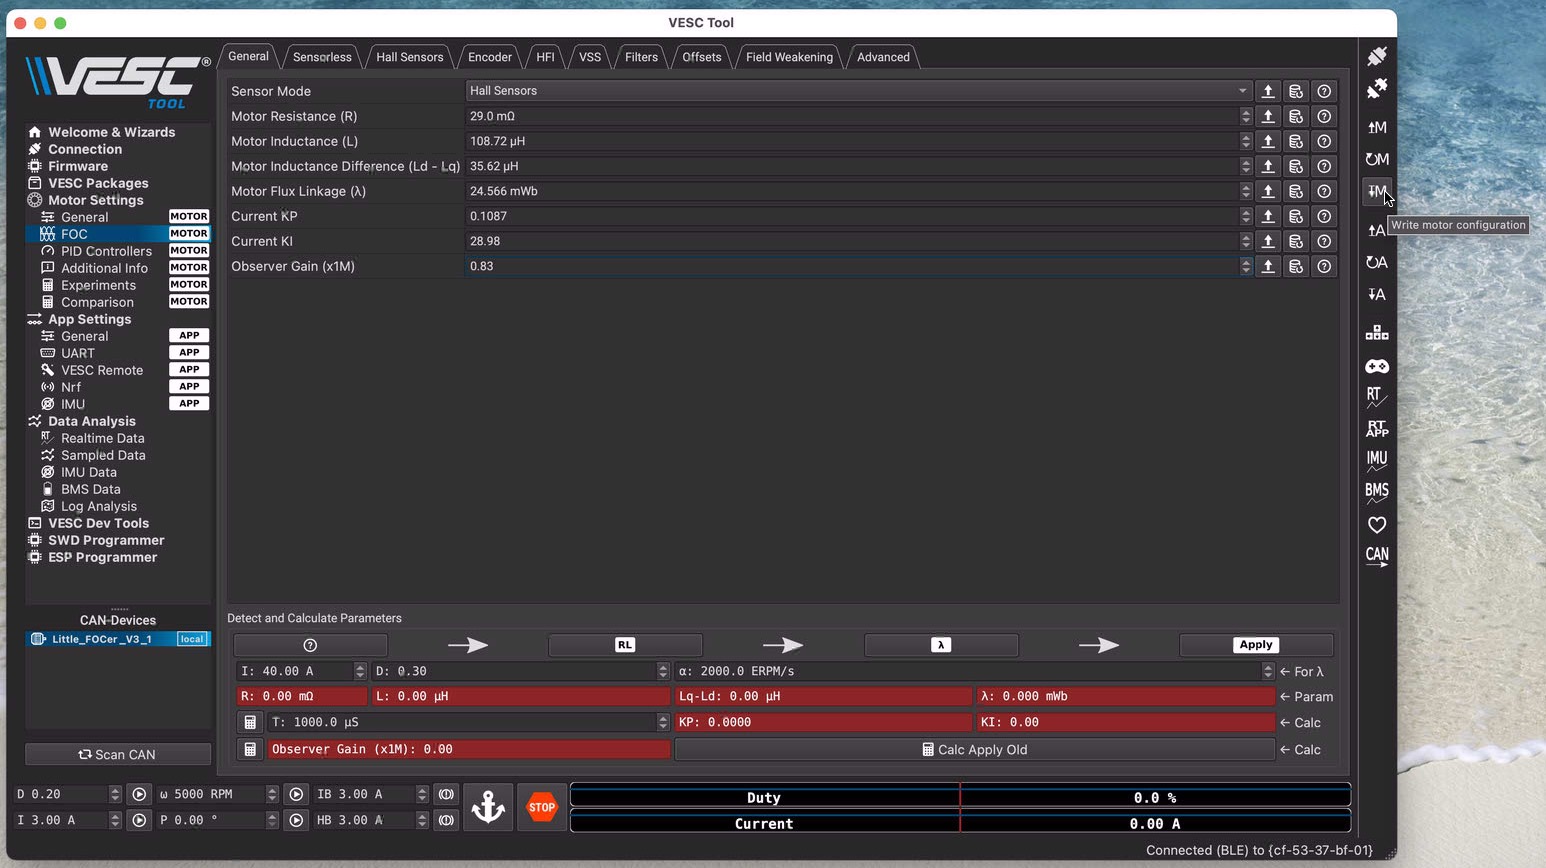
Go to FOC / General
Here you should see the motor resistance and other parameters that were detected by the motor setup wizard. The only value you should change here is the Observer Gain, which you should cut by 50%. Mine showed 1.66, so I changed that to 0.83. Mario from The Board Garage advises to also increase the Motor Resistance value by 20-25%, but I did not try that to see how that makes a difference.
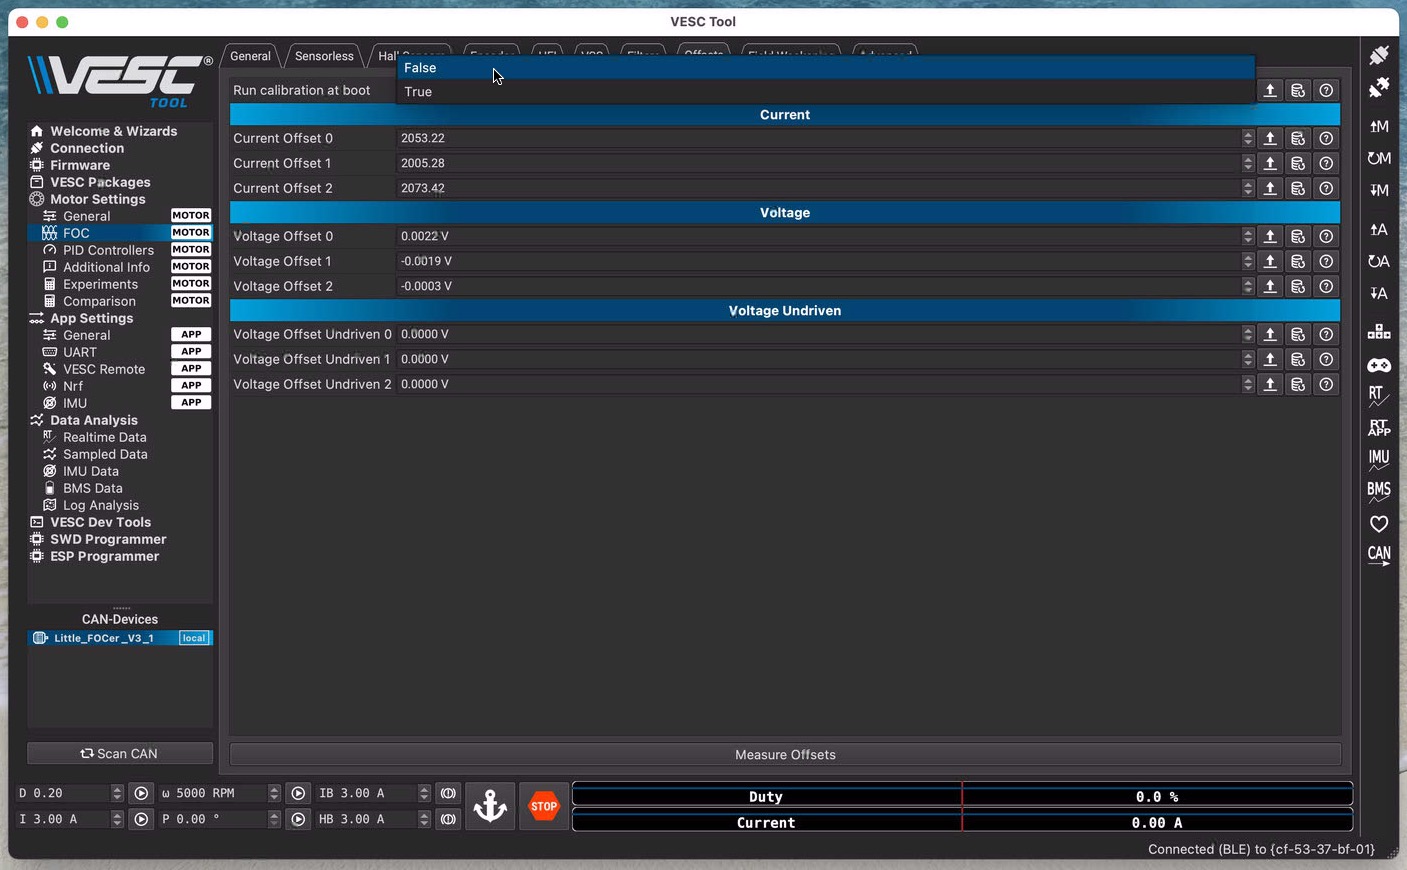
Next, go to the Offsets tab, and switch off Run Calibration at boot.
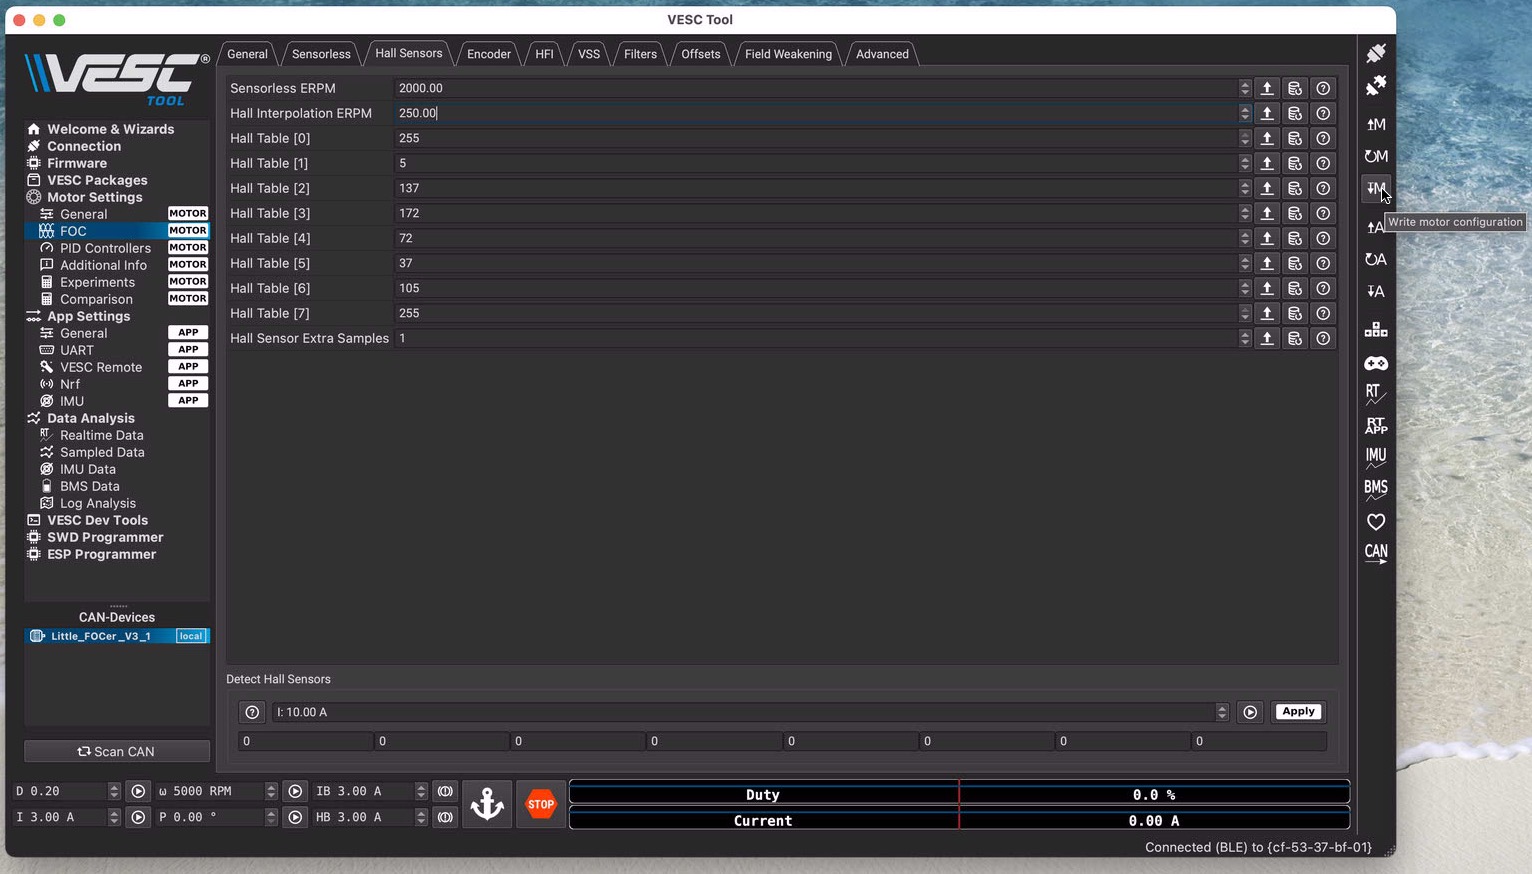
In the Hall Sensors tab, set Sensorless ERPM to 2000 and Hall Interpolation ERPM to 250 instead of the default 500.
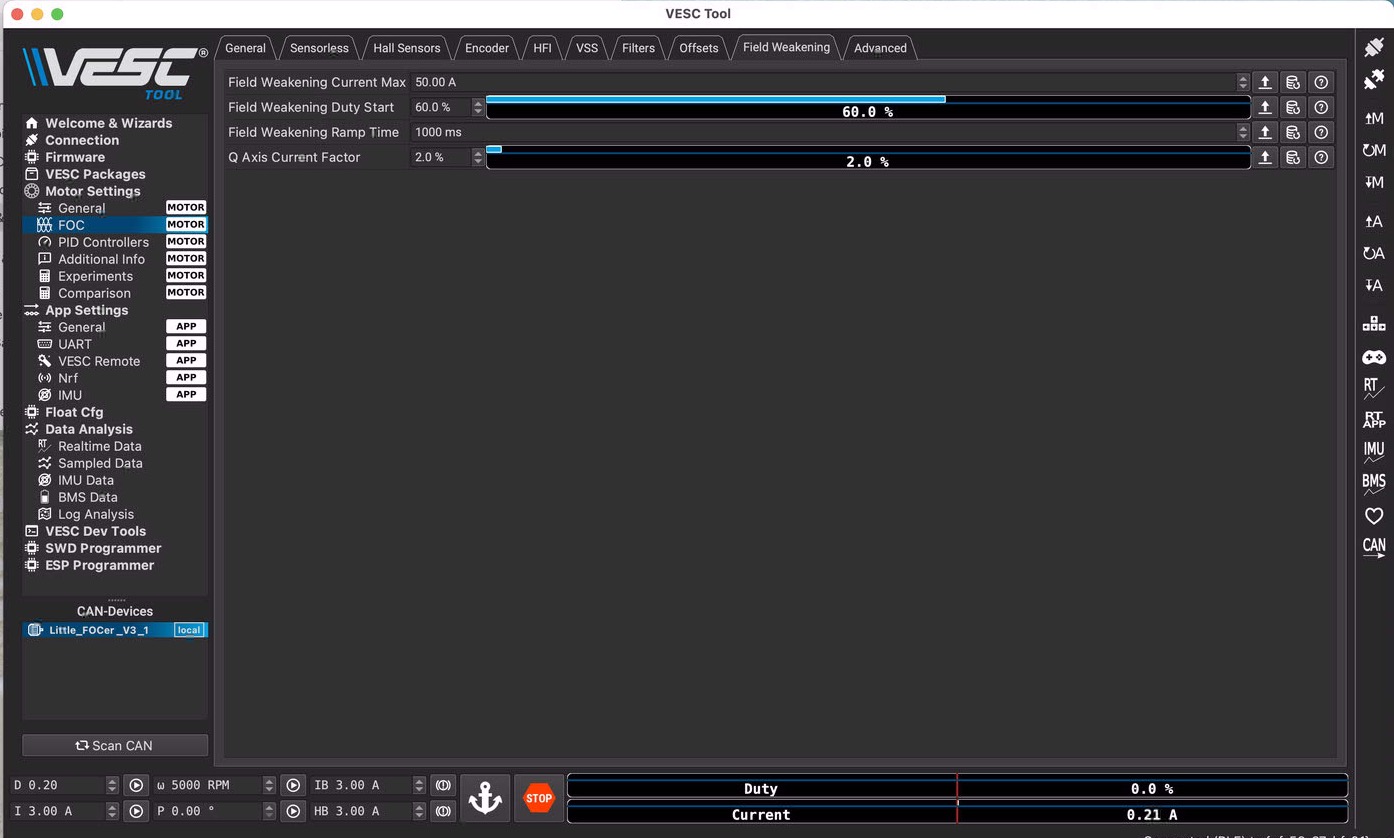
In the Field Weakening tab, set Field Weakening Current Max to 50A, Duty Start to 60% and Ramp Time to 1000 ms.
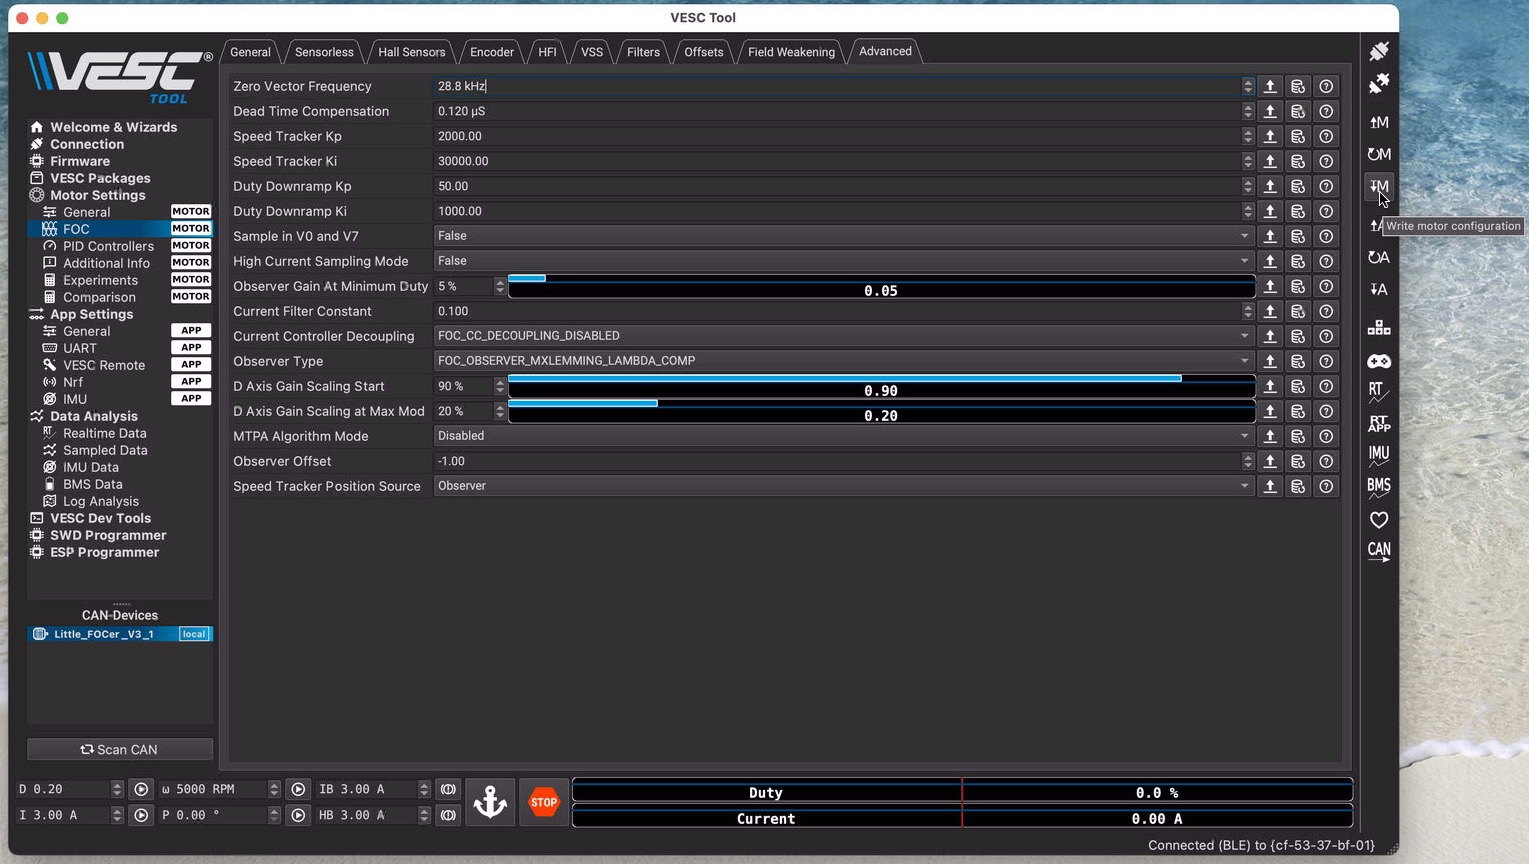
Next is the Advanced tab. Set the Zero Vector Frequency to 28.8 kHz.
The motor configuration is now finished. Write the motor configuration to the VESC once more.
This may also be a good moment to save the motor configuration as an XML file. On the desktop version, this is in the top menu, under File…
IMU
The Inertial Measurement Unit (IMU) is small element on the VESC circuit board that constantly measures things like acceleration, orientation, levelling of the board, in three dimensions (same as in your smartphone). It is an extremely important element to make a boardwheel work. In order to function properly, the IMU must first be calibrated, so the VESC will know which side is up etc.
Go to / Setup IMU to start the setup wizard, which will take you through four steps:
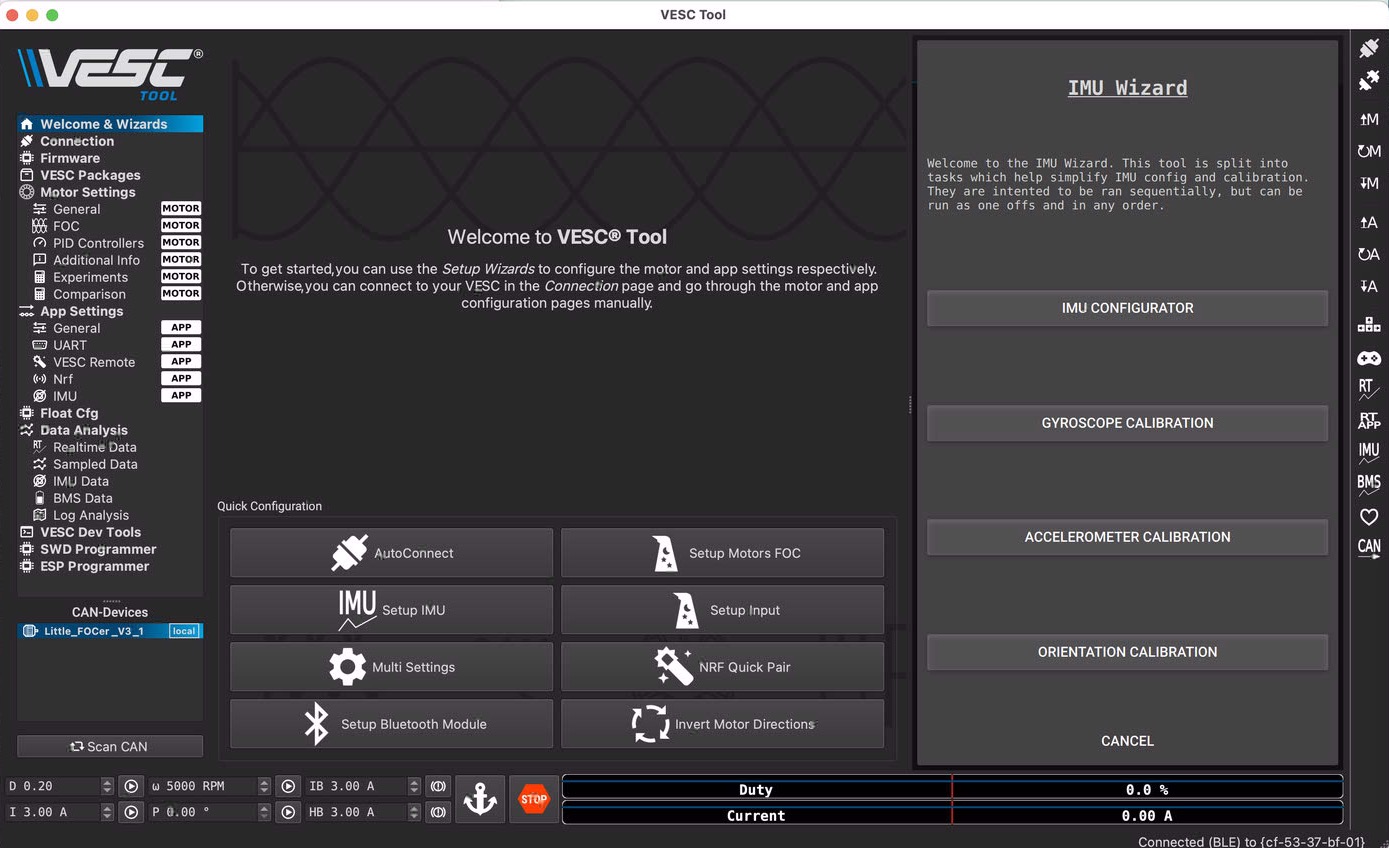
First is the IMU detector / configurator. Make sure you select ‘Balance Skateboard’, as this uses different default values than the others. Then click on ‘Search for IMU’. As long as this sets Detected to true, that is fine, even if it says: IMU type: Read error… You can also search a couple of times, and possibly move the board closer to the computer or phone, which worked for me, although I don’t see how this can be related.
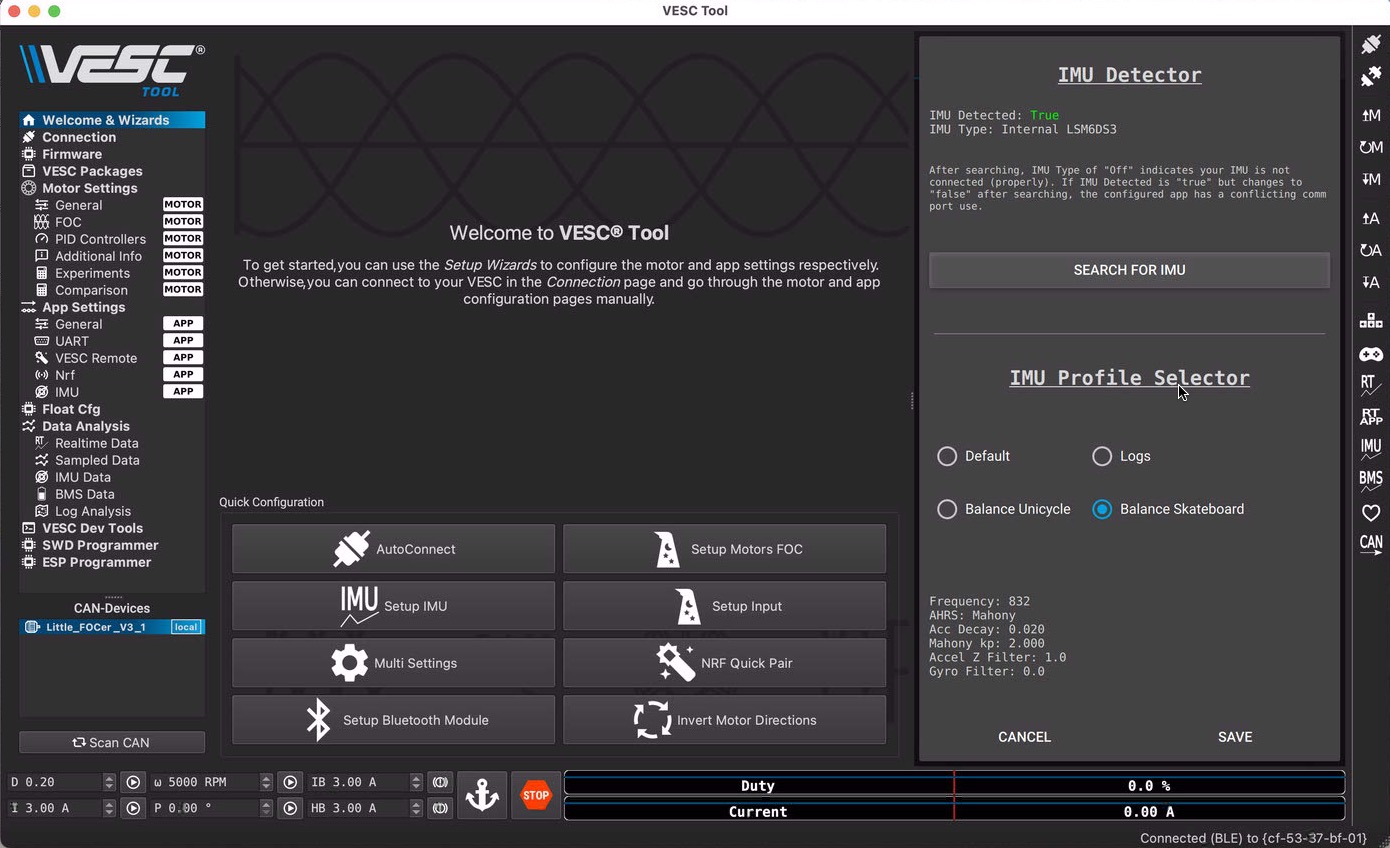
If the IMU Type is detected, you should see a Frequency of 832 Hz. If not, it will stay on 1000 Hz, and you will have to manually change that to 832 Hz after the IMU wizard is finished, as the IMU and the Float Package use 832 Hz. If these values don’t match, the board may behave in ‘funny’ ways. If at least the IMU has been detected, click Save.
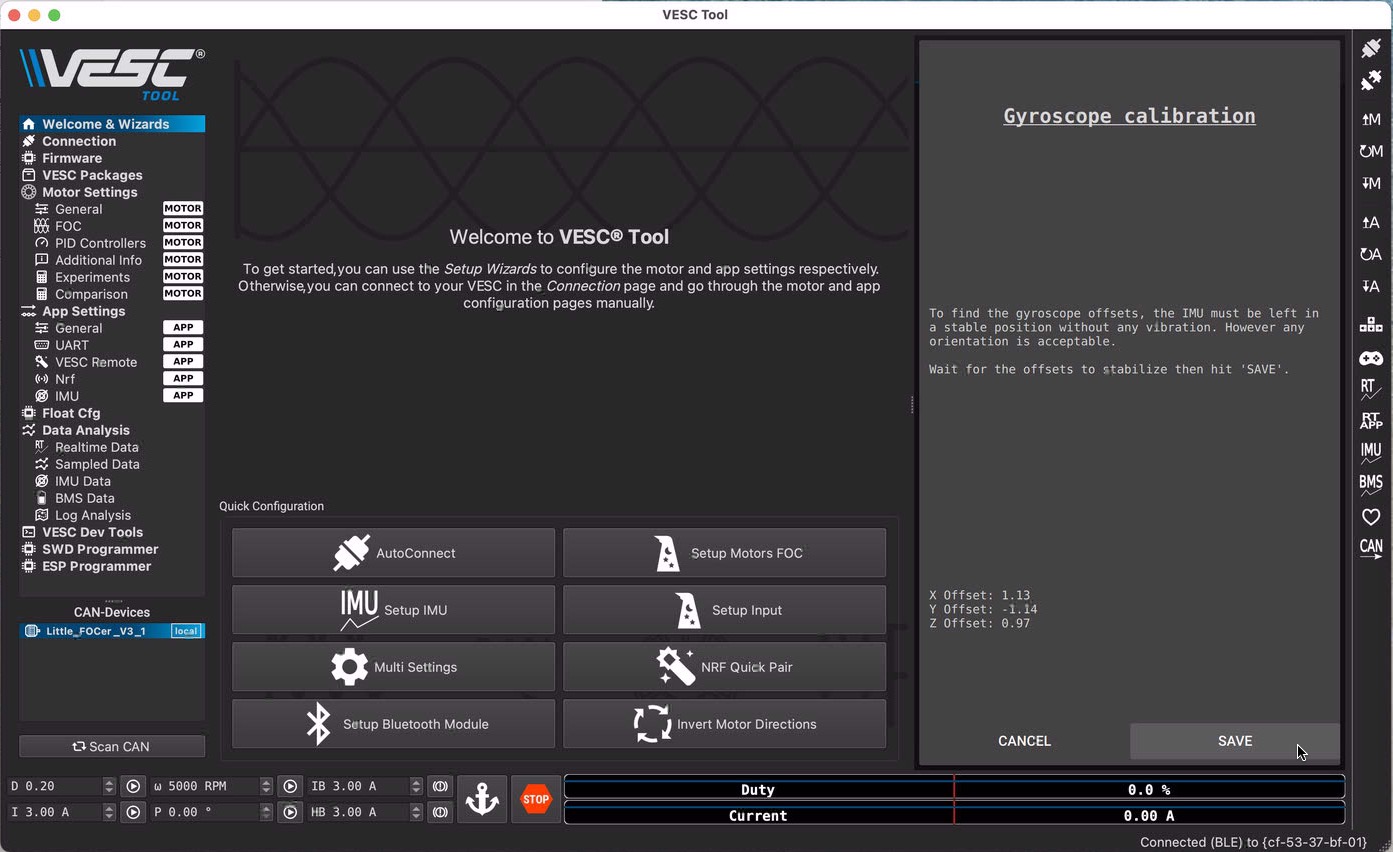
Second is the Gyroscope Calibration. Leave the board sitting still in any orientation and click Save when the values have somewhat stabilized.
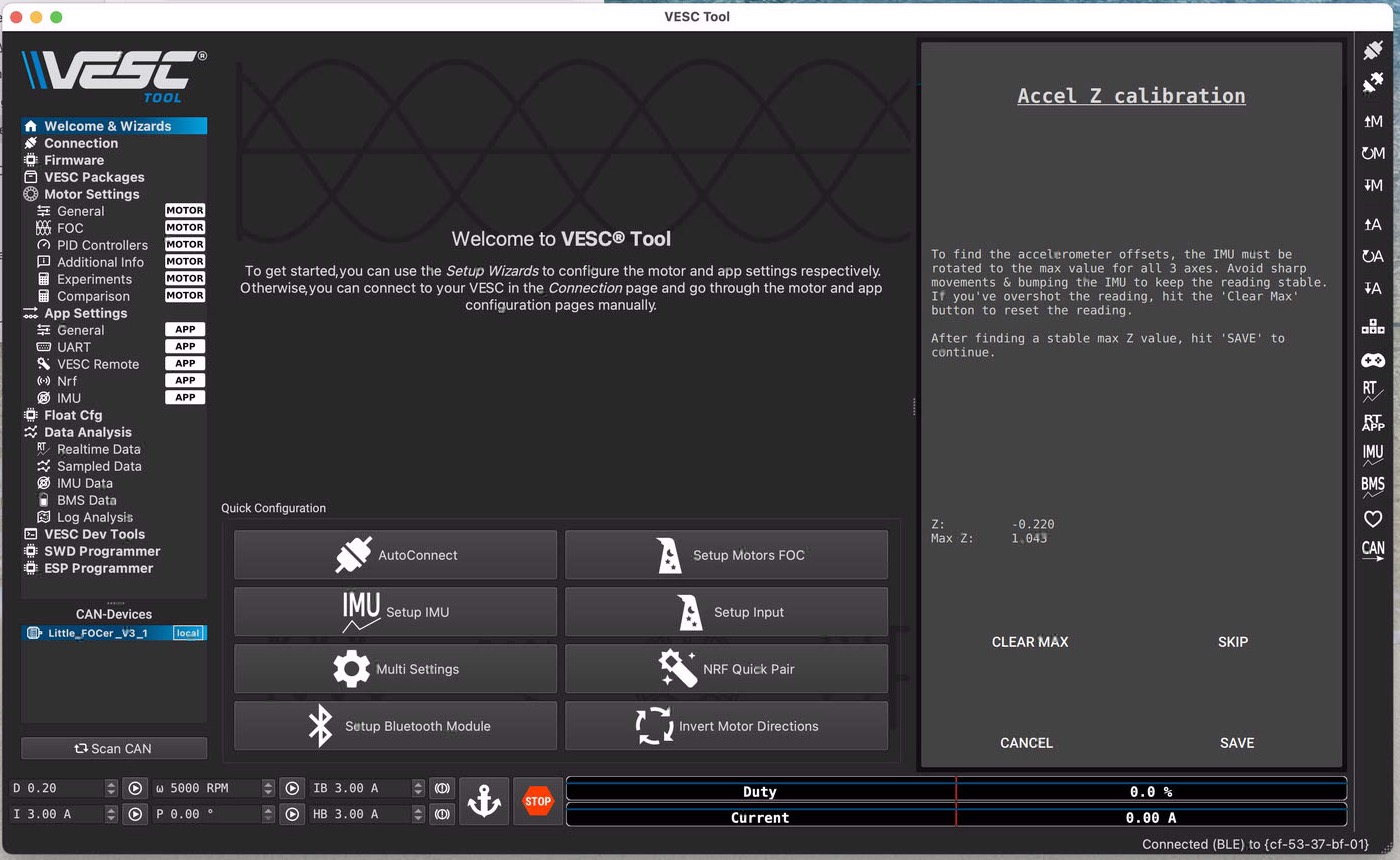
Third is the Accelerometer Calibration. This aims to find the maximum values for the X, Y and Z dimensions, and those maximum values should be as close to 1 as possible for each. Be careful not to shake or bump the board into things. If that does happen, click Clear Max to forget the way too high reading and try to get it close to 1 again. For each direction, you may have to move the board in all sorts of directions to find the maximum position. As soon as you have a maximum reading close to 1, gently put down the board and click Save to go to the next dimension calibration.
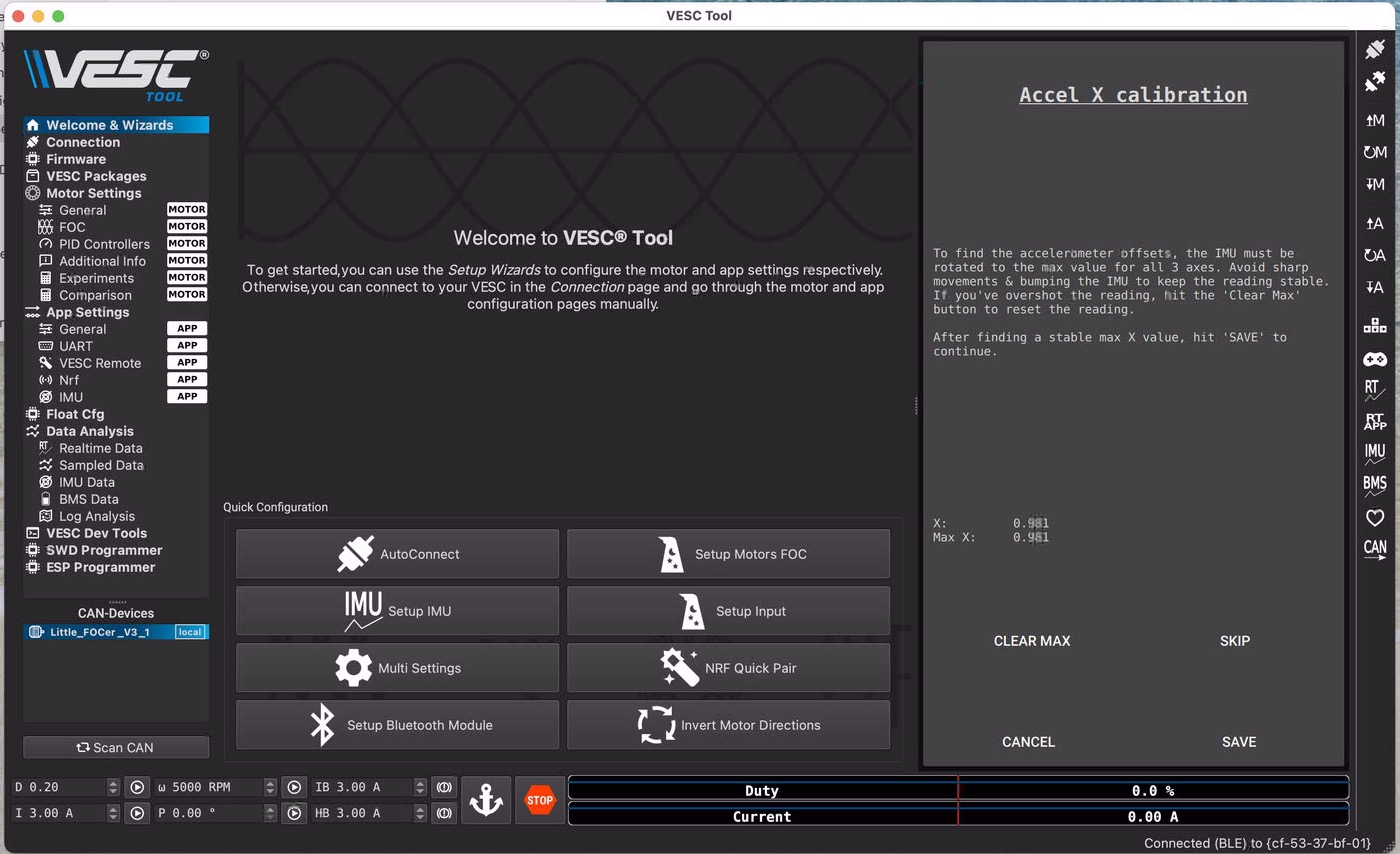
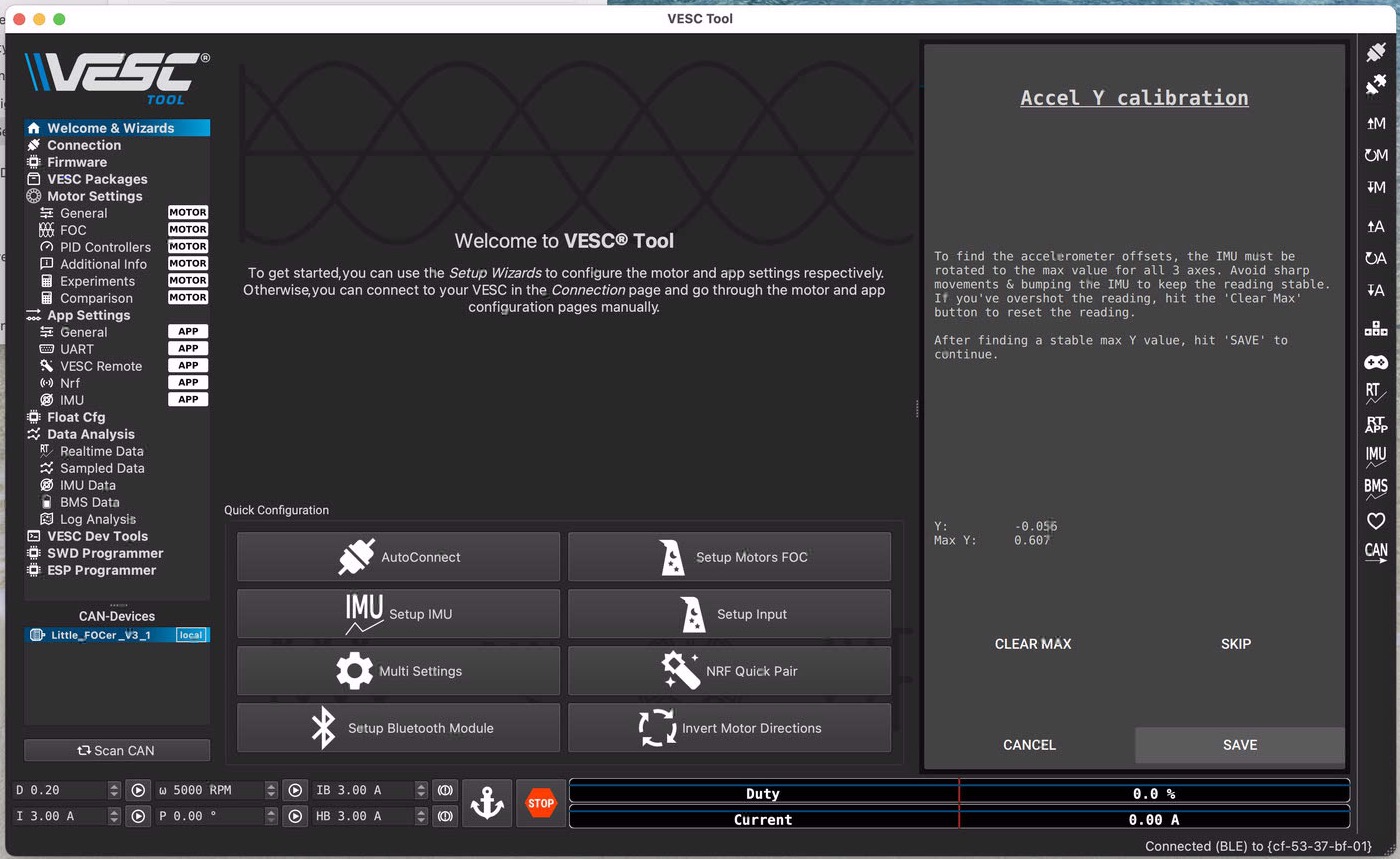
As you can see, I didn’t get the Y value up as much as I had hoped. I tried moving the board in the weirdest angles, but 0.6 was the maximum. Be as it may.
Fourth is the Orientation Calibration. Put the board in a stable and perfectly horizontal position. Using a bubble level on the center piece of the rails works well, and for sideways levelling you can place the bubble level on a footpad. Now you can let the Roll Offset value stabilize and click Save. Same for Pitch Offset, Save.
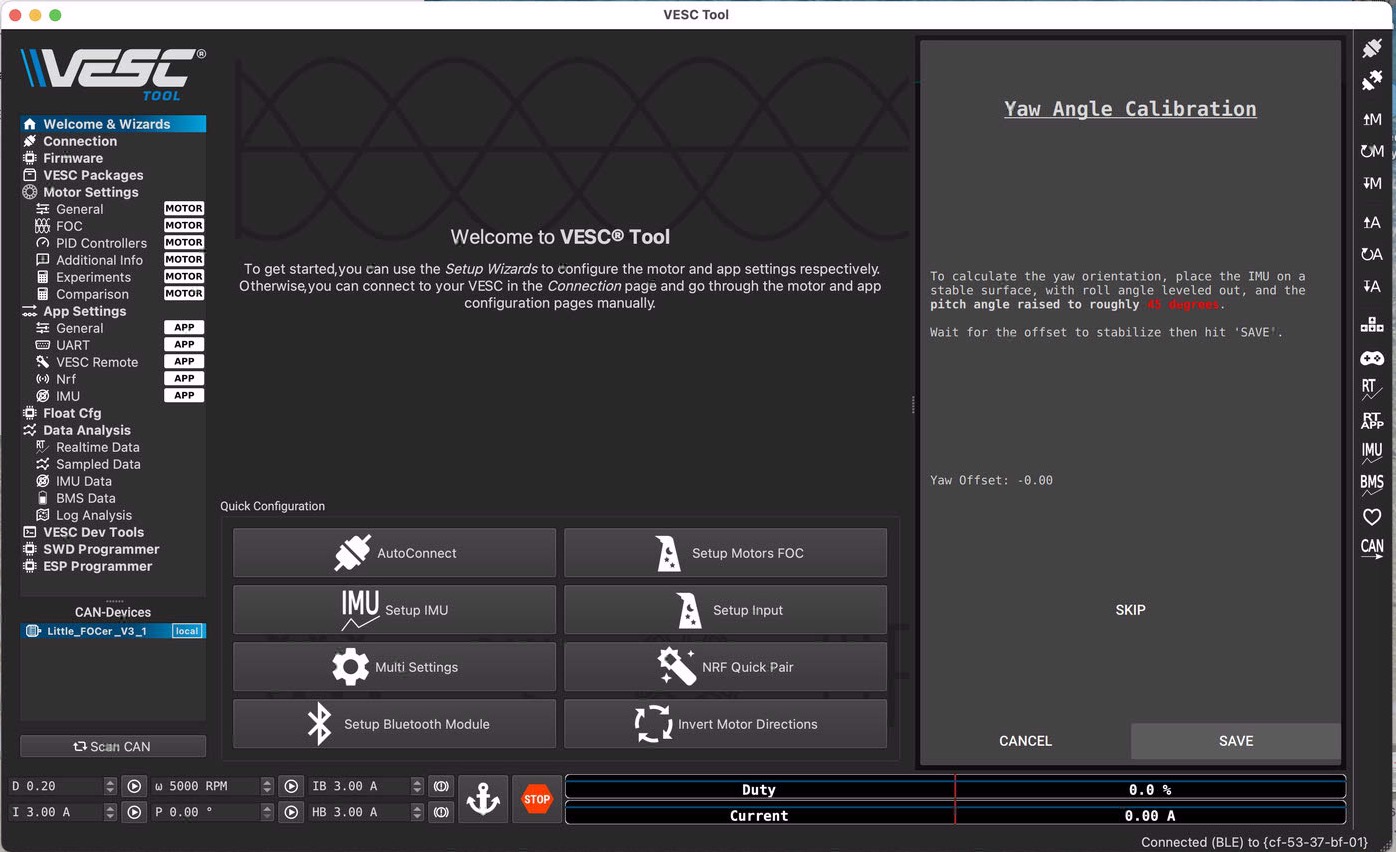
Finally, we need to set the Yaw Offset. Put the board on the floor in its natural starting position. The goal is to make the detected value a multiple of 45. You may have to lift the nose for that. In my case, it just said 0° with the board on the floor, so that was fine.
Next, you can click Cancel to exit the IMU Wizard. That may seem weird, but since you have clicked Save so many times already now, that’s fine.
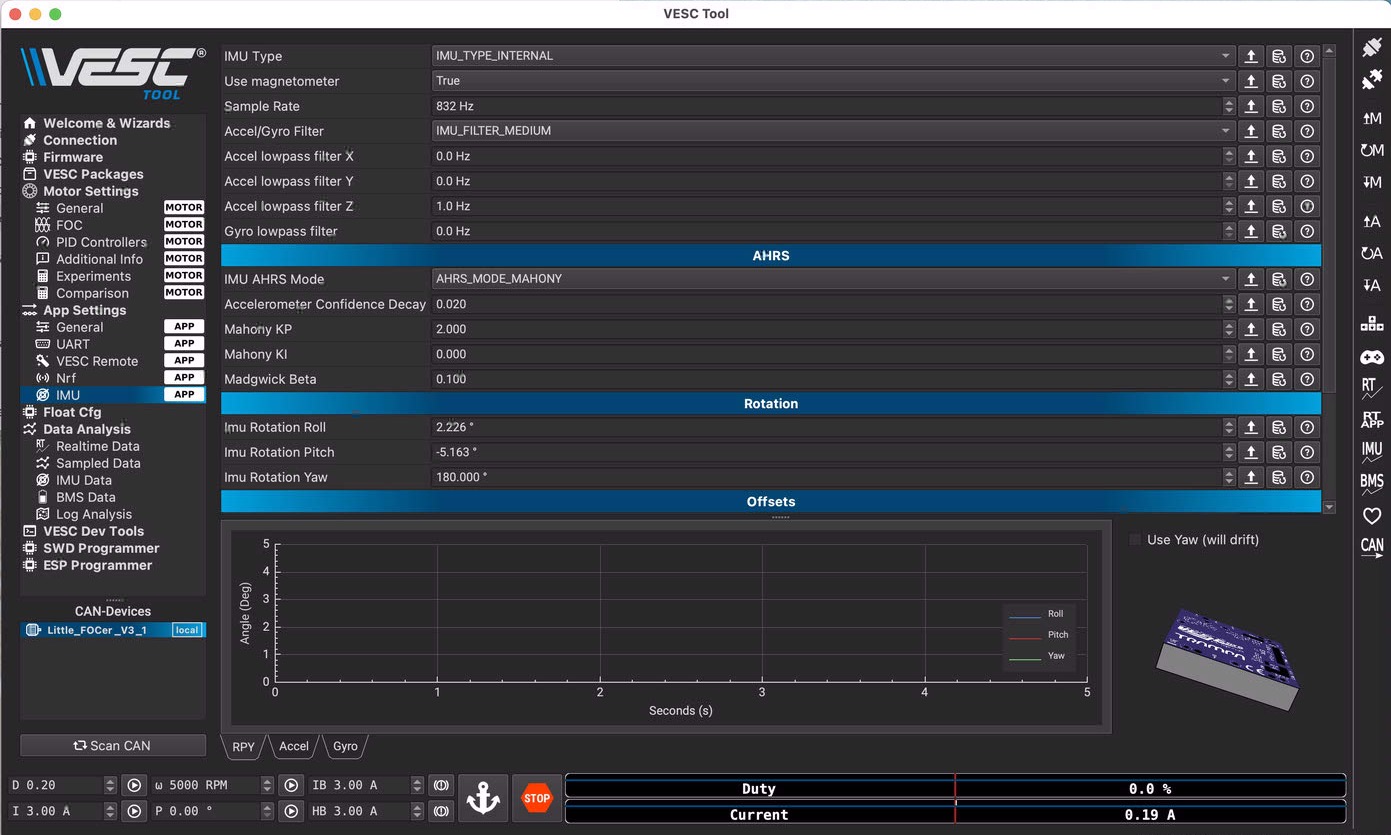
This is a good time to correct the frequency in case the IMU Type wasn’t detected, and the frequency is still on 1000 instead of 832 Hz. To do this, go to / App Settings / IMU:
Now may also be a good moment to save the app configuration (which includes the IMU calibration) as an XML file. On the desktop version, this is in the top menu, under File…
Float Package
Now it’s time to install the Float Package, which deals with all sorts of parameters and functions specific for balance boards.
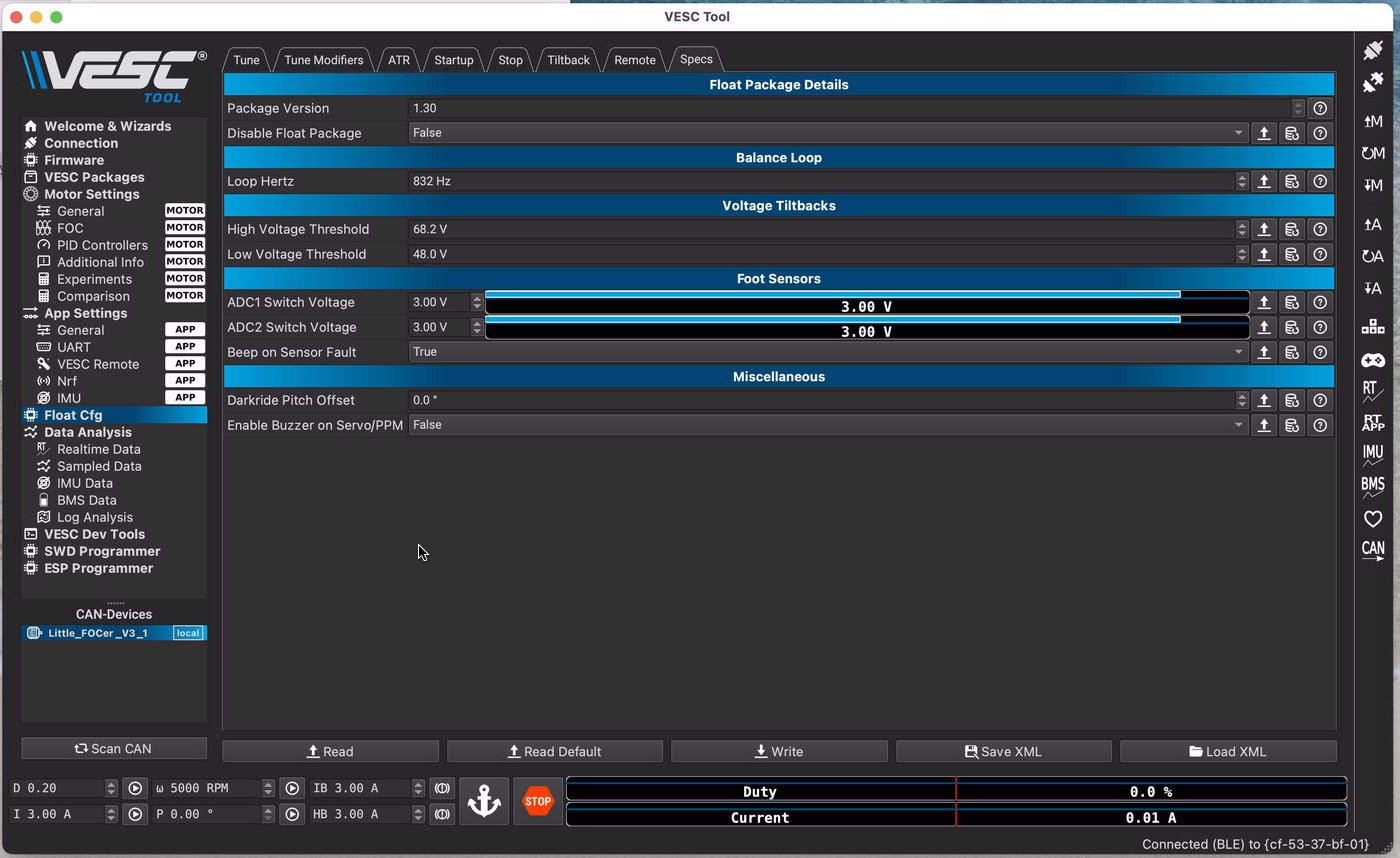
If you had already installed this package earlier, it is probably still disabled at this point. Enable it again by going to / Float Cfg / Specs and select False for the field ‘Disable Float Package’. Then write the motor configuration.
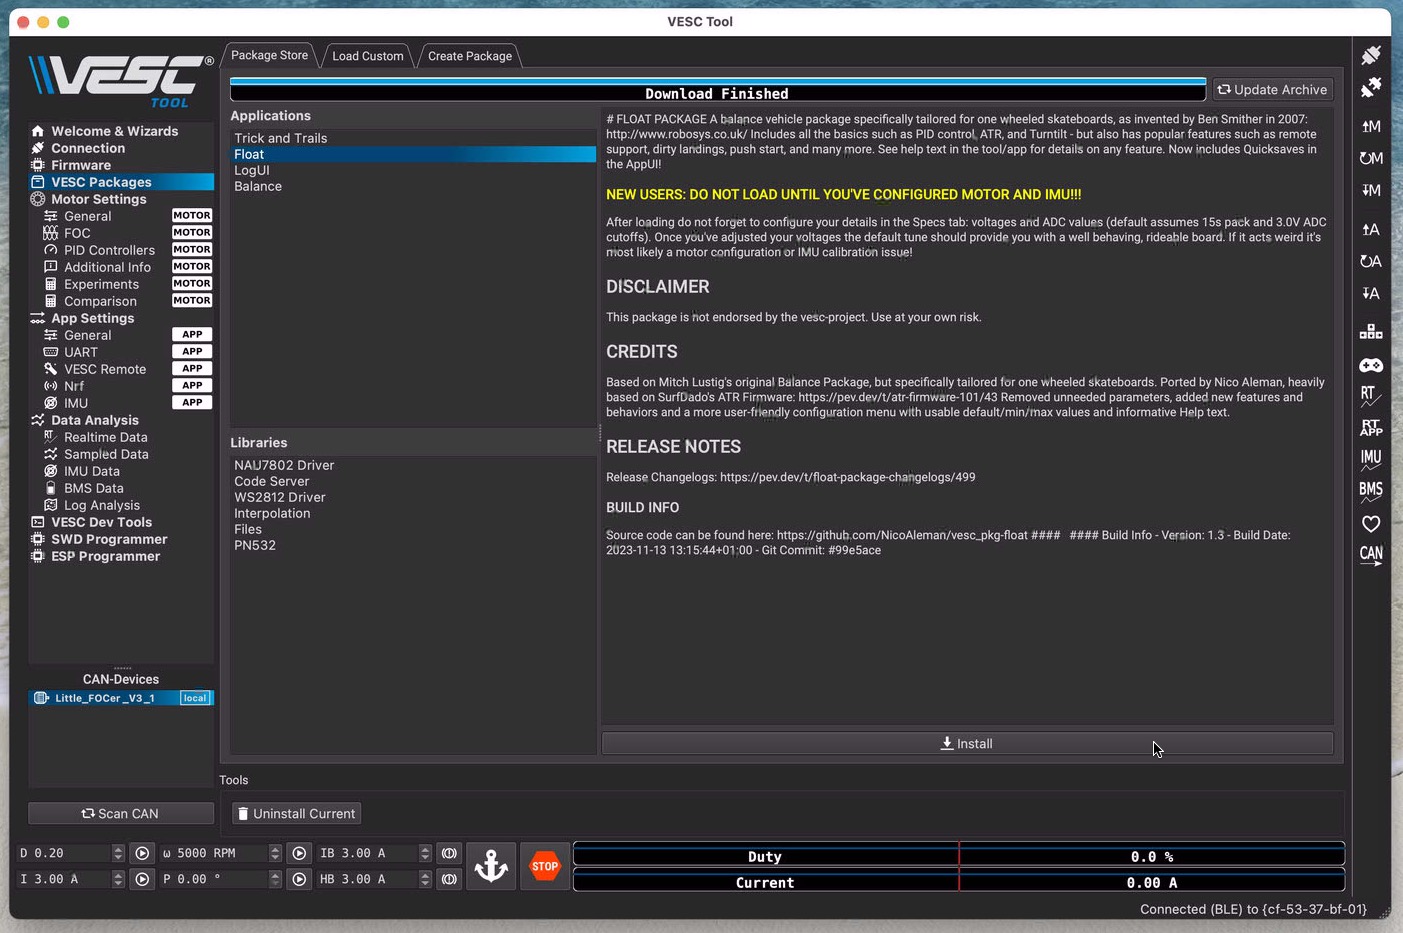
Go to / VESC Packages
You may have to click Update Archive first to see the Float Package. There is also the Tricks and Trails (TNT) package these days, but here, we use the Float Package. Only install the Float Package, as I think the 2 packages can interfere otherwise. TNT does similar things, but in different ways, and is relatively new and not as widely used as the Float Package.
Now you will have a new top menu: / Float Cfg.
In the Specs tab, you want to make sure Loop Hertz is set to 832 Hz for the Superflux. For the High Voltage Threshold, we use (4.2*S)+1.5 and for the Low Voltage Threshold 3*S. In our case that is 4.2*16 + 1.5 = 68.7V and 3*16 = 48V.
Float Package Configuration
Remember that we made sure in the previous steps that the controller would not completely switch off the motor? Instead of that, we want to use a gentle tiltback, so we have to set the corresponding parameters now.
Go to / Float Cgf / Specs
Make sure Loop Hertz is indeed set to 832 Hz.
For High Voltage Threshold, use (4.2*S)+1, in our case (4.2*16)+1 = 68.2V
For Low Voltage Threshold, use 3*S, in our case 3*16 = 48V
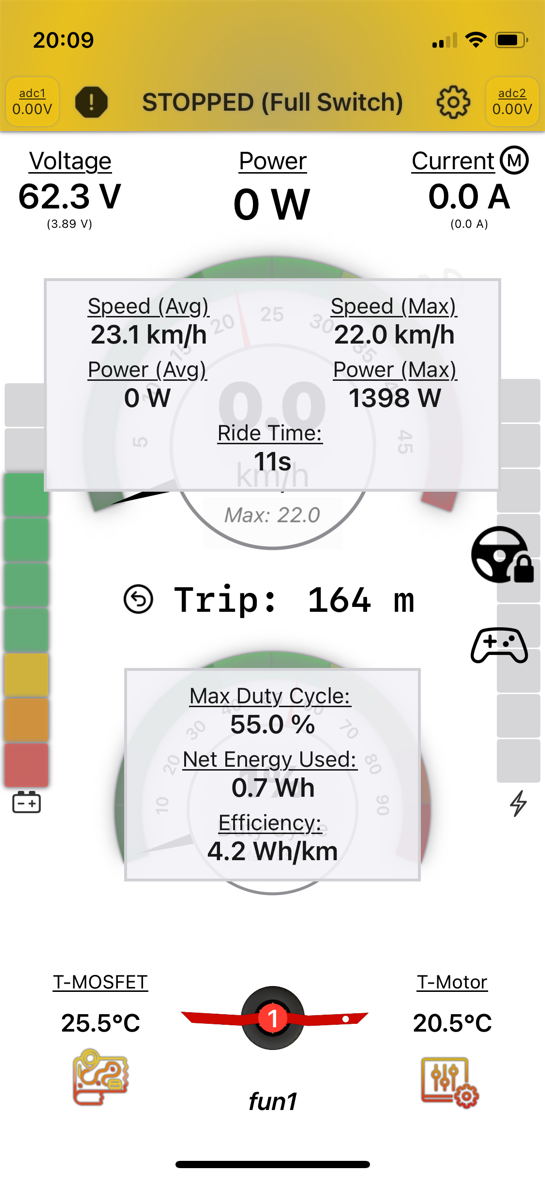
After all these steps, I always like to disconnect the board from the VESC Tool and first connect it to the iOS app ‘Float Control’ by surfdado. One of the many great things about this app is that it warns you if any important parameters are not set correctly. The warnings disappear after a couple of seconds. To get them back, click on the image of your board at the bottom of the screen, click on each alert for details, and make a screenshot. This makes it easier to remember what to do after switching back to the VESC Tool.
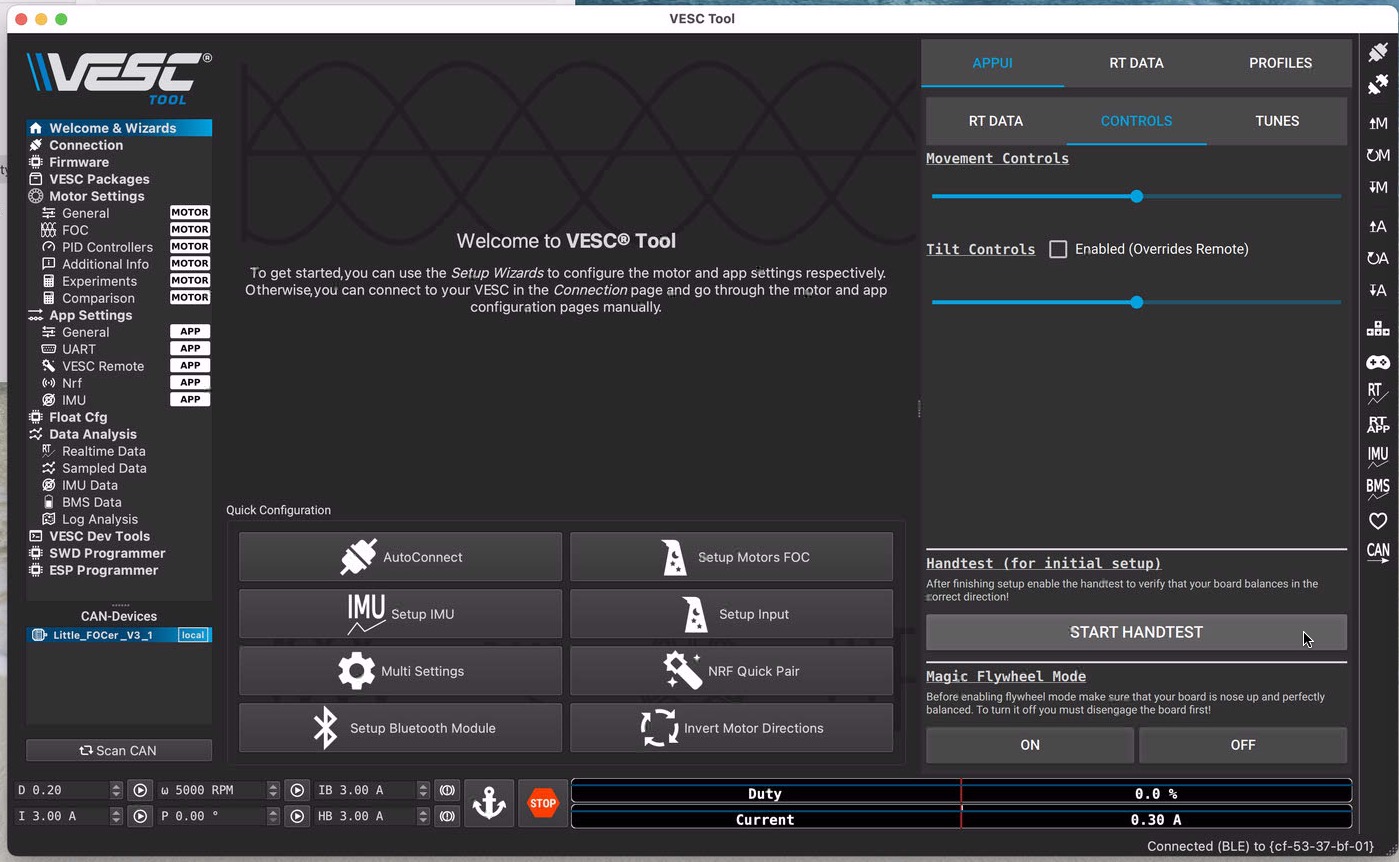
Hand Test
Assuming the board is still sitting on a crate, with the wheel able to spin freely, you can now engage both footpad sensors to test if the wheel starts spinning. Do not do such a first test on the floor, as the motor has a LOT of power, and if for instance the spin direction is not set correctly, the board will take off in the wrong direction, and trust me, you will not be able to stop it to avoid the almost certain damage to whatever is in its way.
There is also a special ‘hand test’ mode, which should limit the power to the motor, but from what I’ve read, this mode can introduce some funny behavior, and it’s not really worth it. If you are at least sure that tilting the board make the motor spin in the right direction, and the motor stops when it is roughly level (you can test this on the crate with the motor spinning freely), and Float Control doesn’t show warnings, you can now test it on the floor. I recommend doing this outside or in some other roomy place without delicate expensive items standing close by. If you do want to use the explicit ‘hand test’ mode, it looks like this (desktop):
Tuning
At this point, your board should be usable, but you may want to tune certain parameters, to make the board fit your personal riding style better. Go to APPUI / Tunes to see tuning packages made by other riders, which can be a good starting point to play around with tunes. I personally like Nico’s Street Growler. I hardly ride streets and I don’t have a growler, but it just feels good to me. Hannes’ VESCmann Allround also seems to work well for me.
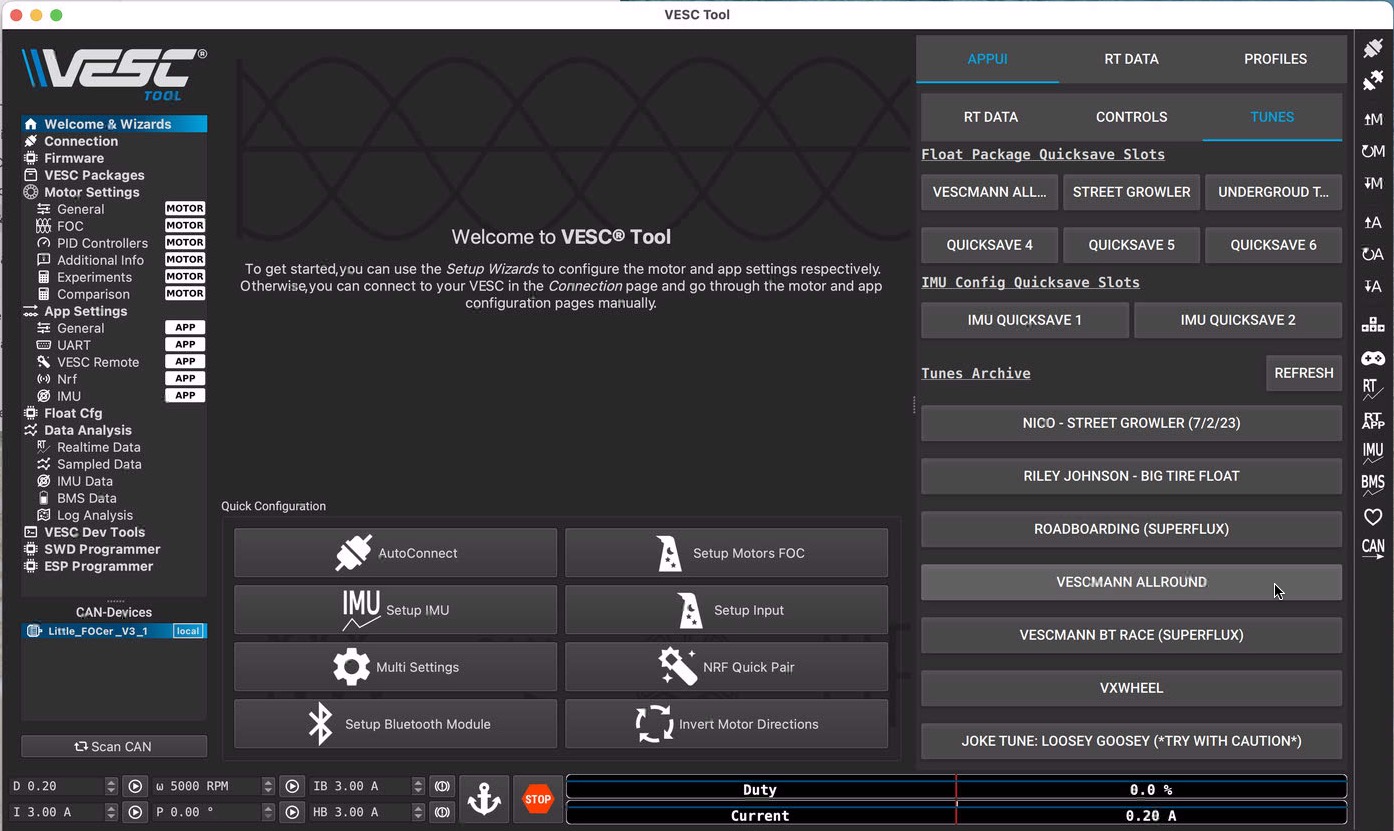
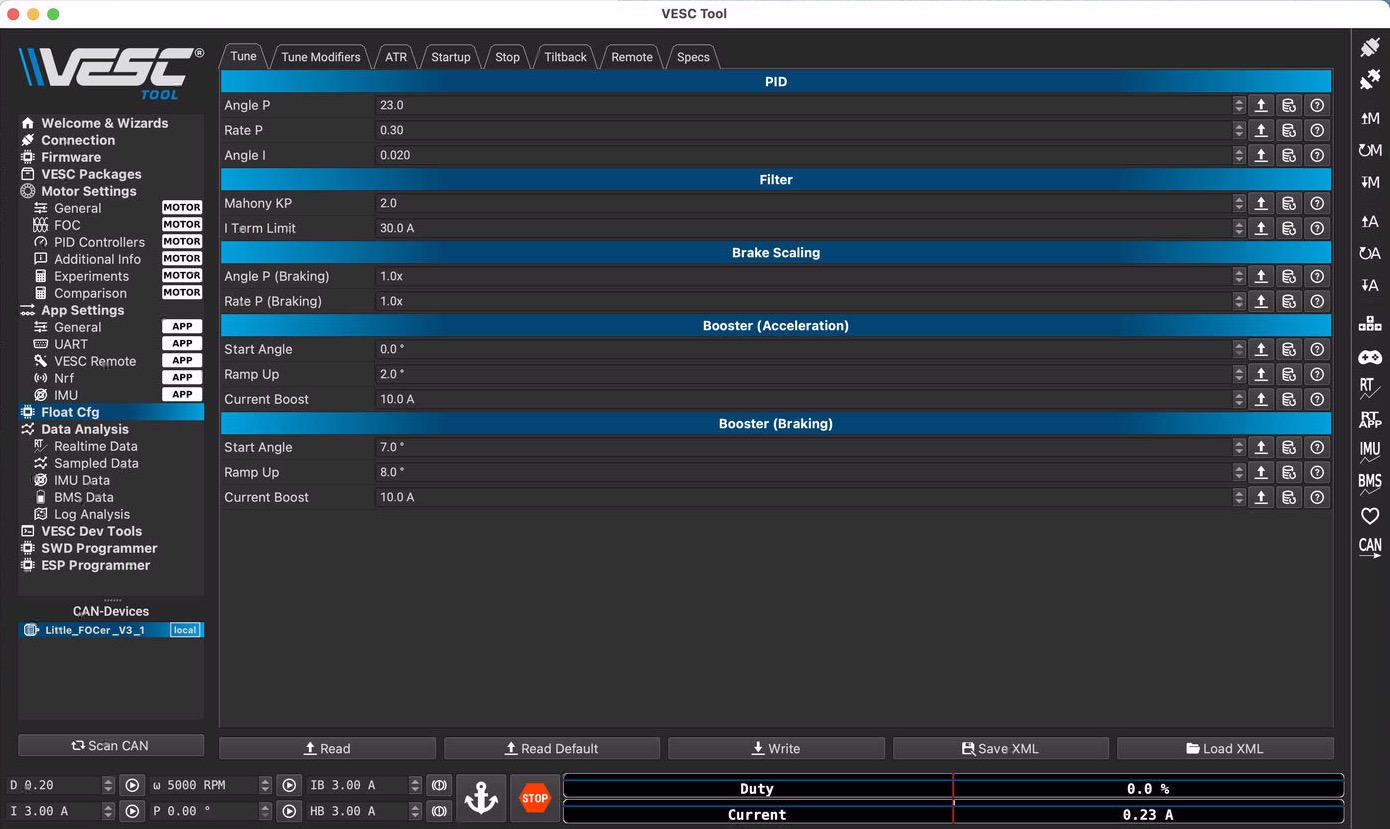
After you activated a tune, remember to go back to the / Float Cfg and click Write to write it to the VESC, otherwise the values may disappear after a disconnect or restart. Long-click on one of the Quicksave buttons to save the current tune under a name of your choice. You can see the results of an activated tune in the / Float Cfg / Tune tab.
There is also a Tune Modifiers tab, which I think is to temporarily overrule some of the Tune parameters, but I haven’t used that tab yet myself.
Remote Tilt
A well configured VESC will automatically tilt a bit extra when going uphill or downhill, but if you still need more, you can use a remote control for some extra tilt. If things get steep really fast, this may come in handy, for instance in a halfpipe, where you don’t actually mean to keep climbing the vertical bit – you just need the clearance.
There are several options available. The Voyager BKB is a popular one, but I find it a bit too bulky to keep in my pockets during 99% of the time I don’t need it, so I went for the Flipsky VX4 V6. A good guide for the BKB was write by Nico Aleman here, and in the comments the VX4 is mentioned as well.
A common issue when connecting the extra Bluetooth module for the remote in your board to the comm port is the order of the TX and RX pins. I did not have to swap them with the VX4, but the connector of the module had 8 pin holes instead of 7, so I simple cut off the extra one with a knife (the last hole that is closest to the TX and RX pins). Actually, I had to cut off two instead of one, to make it plug into where it should be, but those last two are not used anyway.
I also found it tricky to get the remote to connect to the module. The trick was to put the remote in pairing mode before switching on the board, and keep the controller box open with the remote module visible. To put the remote in pairing mode, long-press the settings button, and when the screen says ‘paring’, long-press it again. Now switch on the board and you’ll see the module blinking at first, and when it goes blue nonstop, the remote is paired, at which point you can close the board.
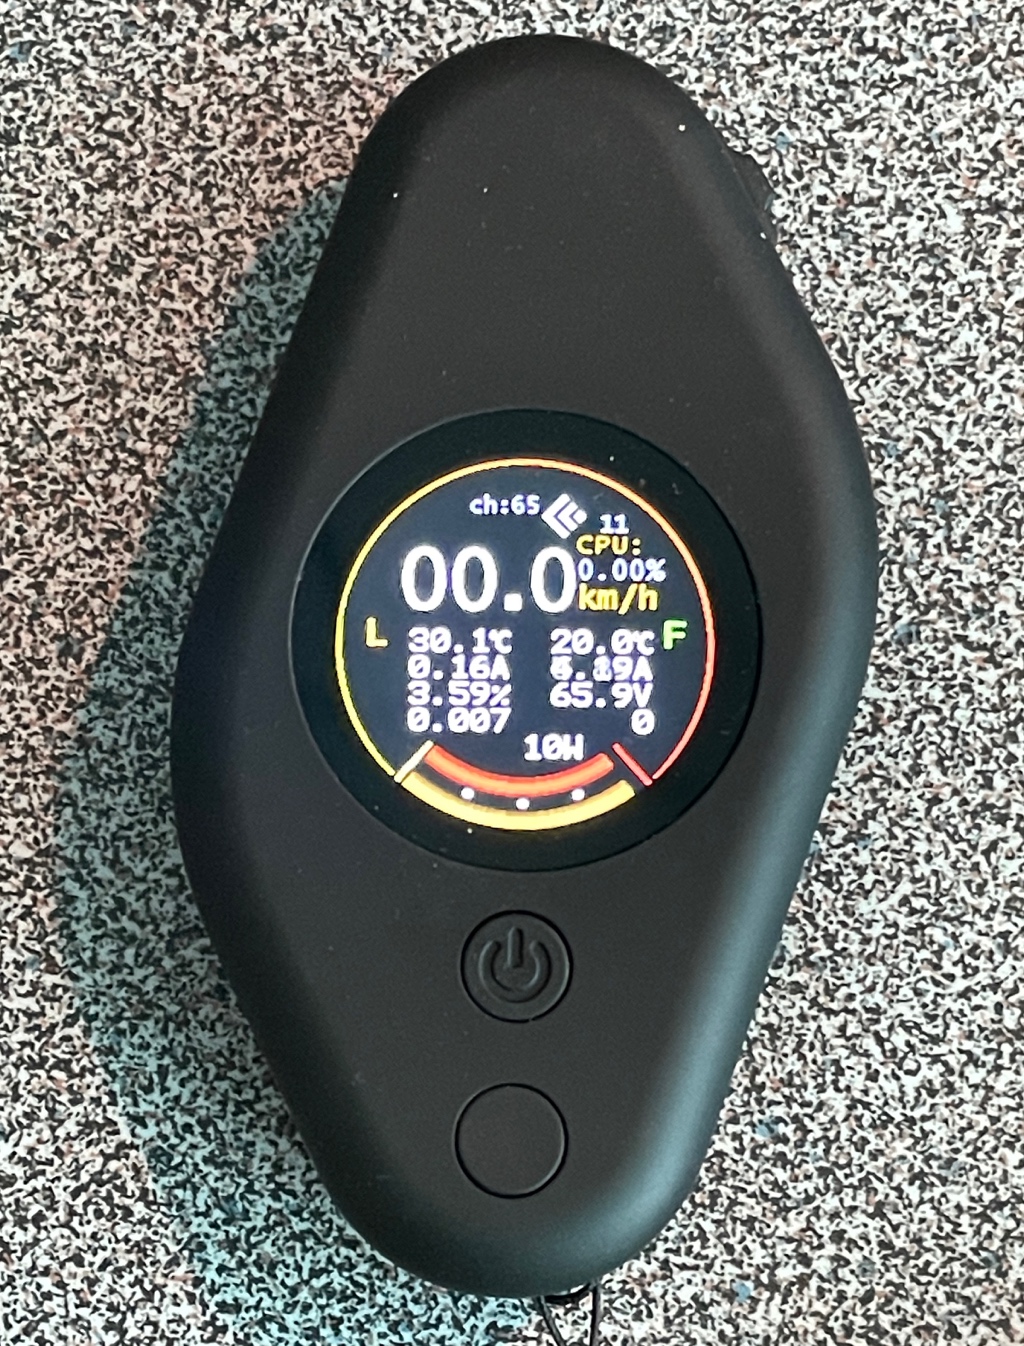
If the remote was paired correctly and the RX/TX pins are in the right place, you’ll now see the channel nr changing all the time, and the red board battery indicator appears:
My module has a connector for a Bluetooth antenna, but no such antenna was in the package, so I used one from an old laptop, stuck the antenna through a cable gland and glued it to the outside of my metal Floatboxx to make double sure it would not suffer from Faraday shielding.
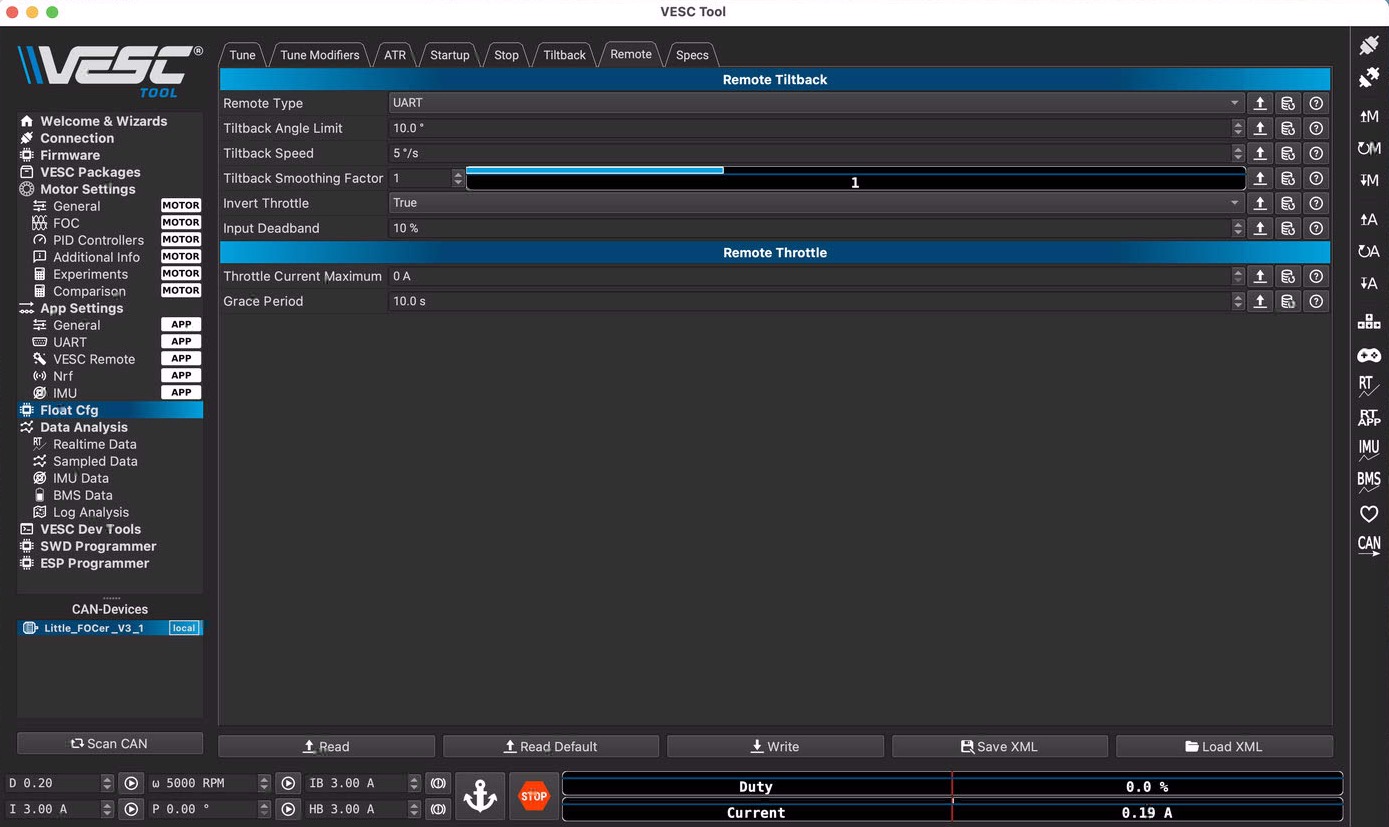
For the correct configuration of the remote, make sure / App CFG / VESC Remote / Control Type is set to None (we deal with the remote in the Float Package instead).
In / Float Pkg / Remote, set the first couple of parameters. I like the maximum angle change to be at roughly 10°, and have that change at a rate of only 5° per second to not make it too abrupt.
Do another hand test where you level the board on the floor with your hands, and in the hand that’s over the battery box, hold the remote, and use it to see if it works as expected. When you then step on the board to test it, take care and don’t tilt it too much at first, as it is a very unnatural feeling, and you run the risk of riding in directions you don’t want to go. It takes some getting used to.
Save Float Config
Your board should now be completely ready to ride. It is probably a good idea to save the XML file with the Float Package settings now. In the desktop version, this is a button at the bottom. In the phone version, it is probably at the bottom under the … menu. Don’t get confused by the VESC Tool telling you it is about to save the XML file with the motor configuration. If you use this from the Float Package, it will actually save an XML file with the Float Package Configuration, including the remote tilt setup.
To Do
I am planning to make a version of this document where you can fill in your motor, battery, and BMS, and then the values in this text should update automatically. I am planning to do this with jQuery. If anybody thinks they can help, please contact me. Otherwise, please don’t hold your breath – I love the idea, but it’s not on the top of my priority list.
Enjoy your ride
And that’s it. Have fun with you freshly configured Superflux boardwheel.
- Jeroen SUPzero
 Bis auf weiteres gilt mindestens 2 Meter Abstand zwischen allen Teilnehmenden (inklusive Leiter). Der Abstand gilt vor, während, und nach Unterricht oder Tour (inklusive Pausen und Transport).